Wednesday, March 27, 2013

Blackberry Coffee Cake

Blackberry Coffee Cake


Blackberry Filling
1 1/4
cups frozen (thawed and well drained) blackberries
1/2
cup finely chopped pecans
3
tablespoons granulated sugar
1 1/2
teaspoons ground cinnamon 
 
Coffee Cake
2 1/4
cups Gold Medal® all-purpose flour
1
teaspoon baking powder
1/2
teaspoon baking soda
1 1/4
cups granulated sugar
1
cup butter or margarine, softened
1
teaspoon vanilla
2
eggs
1
container (8 ounces) sour cream 
 
Powdered Sugar Glaze
1 1/2
cups powdered sugar
3
to 4 teaspoons water
  1. Heat oven to 350°F. Grease bottom and side of 10-inch angel food (tube) cake pan with shortening; lightly flour.
  2. In small bowl, mix all Blackberry Filling ingredients; set aside.
  3. In medium bowl, mix flour, baking powder and baking soda; set aside. In large bowl, beat granulated sugar, butter, vanilla and eggs with electric mixer on medium speed 2 minutes, scraping bowl occasionally. Beat in flour mixture alternately with sour cream on low speed.
  4. Spread one-third of the batter in pan; sprinkle with half of the filling. Spoon another one-third of the batter by tablespoonfuls over filling; sprinkle with remaining filling. Spoon remaining batter over filling; spread evenly.
  5. Bake coffee cake 55 to 65 minutes or until toothpick inserted in center comes out clean. Cool 10 minutes; remove from pan to wire rack. Cool completely, about 1 hour 30 minutes.
  6. Meanwhile, in small bowl, stir all Powdered Sugar Glaze ingredients until smooth and thin enough to drizzle. Drizzle over cooled coffee cake.
Makes 16 servings

Tuesday, March 19, 2013

Mini Omelet Muffins

You Will Need:

  • Muffin Pan (a pan that makes larger muffins works best!)
  • 6 Eggs (beaten and seasoned with ¼ tsp salt and 1/8 tsp pepper)
  • Mix-Ins (you can really choose anything you want here, but for a more healthy option, choose less meat and cheese, and go for more veggies!)

    -Diced Ham or Bacon
    -Carrots
    -Tomatoes
    -Onions
    -Spinach
    -Bell Pepper
    -Shredded cheese

Directions:
1. Preheat the oven to 350 degrees and generously grease the bottoms and sides of your muffin pan to ensure a stick-free removal once the omelets are done baking.

2. Make sure your eggs are beaten and you’ve added the salt and pepper.
yt1tHCIDLKUCngJtcr0wFmHj.jpeg:Amazon:photo

3. Fill the bottoms of your muffin pan (about 1/3 of each individual tin) with the different mix-ins you chose. Try some ingredients by themselves or make a bunch of different, yummy combinations. It’s really up to you :)

4. Then fill the tins with your eggs. The omelets will puff up a little when you bake them, so make sure to leave just a tiny bit of space at the top of each tin.  Stir each mixture slightly to combine your eggs with the ingredients.
LDTKW3yfXnFRkvVgcCQDXuPo.jpeg:Amazon:photo

5. Bake for 18-20 minutes, or until you can poke the centers with a knife and it comes out clean (or almost clean).

Let them cool a bit before eating them, but once they’re done, go ahead and chow down… Or, save them for later!  You can eat them warm or cold, at home, on the go, at breakfast, for lunch, or even at dinner. They’re a yummy, healthy choice for any time of the day.

Wednesday, February 27, 2013

S'MORES Pancakes

s'mores pancakes 

S'MORES Pnacakes - compliments of The SPOONFUL.  My whole childhood life - I LOVE marshmallows.   You would think I would've grown up and given up this obsession as an adult, but I don't think I ever did.  Now - it just seems I'm allowed to indulge in them whenever I choose.  Which well - let's just keep it a secret as to how much. 

These pancakes are a MUST have this Saturday morning in my household.

What you'll need

  • Your favorite pancake recipe
  • Chocolate chips (optional)
  • Jumbo marshmallows
  • Chocolate syrup

How to make it

  1. Mix up your favorite pancake recipe or mix. I used a basic buttermilk recipe and threw in a handful (okay, fine. TWO handfuls.) of chocolate chips. Cook as directed, aiming for pancakes that are about 3"-4" in diameter.

  2. You have two options for melting your jumbo marshmallow:
    1) Put the marshmallow on a skewer and toast it over a low gas burner on your stove until it is golden brown and melted all the way through.
    OR
    2) Place the marshmallow on top of one panckae and microwave for 20-30 seconds on High. Keep an eye on it, because it will expand quite a lot this way!
  3. Sandwich the toasted/melted marshmallow between two pancakes and smoosh it down so all that gooey goodness comes squishing out of the sides just a bit. Drizzle with chocolate syrup and gobble it up!
  4. Go clean your face. You've got chocolate and marshmallow all over your chin!

Tuesday, February 26, 2013

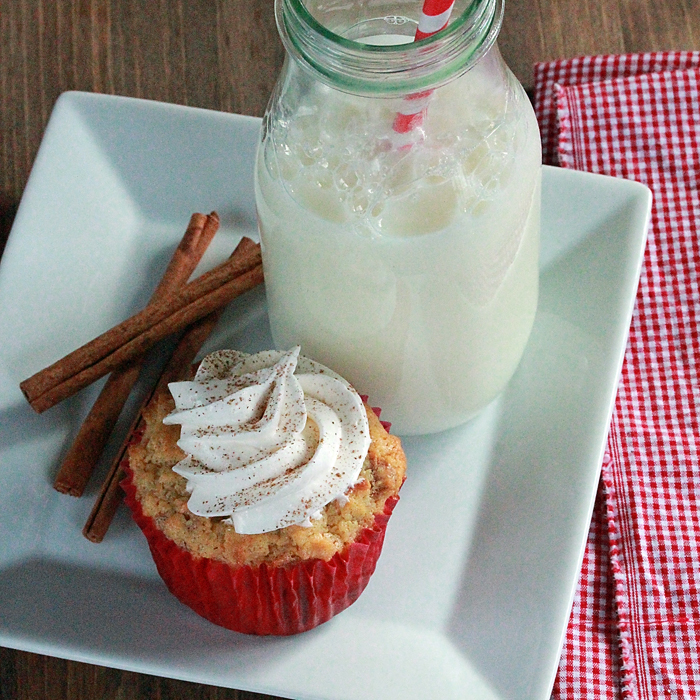
French Toast Cupcakes

Do you ever have bread that's more then a few days old - it's not moldy but it's kind of stale.  You don't want to trash it because you're frugal but no one in your family will eat it either because well - it tastes yuck. 

We have a solution.  French Toast Cupcakes.

french toast cupcakes 
 
Ingredients
  • ½ loaf French bread, cubed (or any kind of stale or day-old bread)
  • ½ C. sour cream
  • 4 large eggs, beaten
  • 1¼ C. half and half (use milk to make it even more frugal)
  • 3 Tbsp. butter or margarine, melted and cooled
  • ¼ C. maple syrup
  • 2 Tbsp. sugar
  • ½ tsp. cinnamon
  • Cool Whip Frosting
Instructions
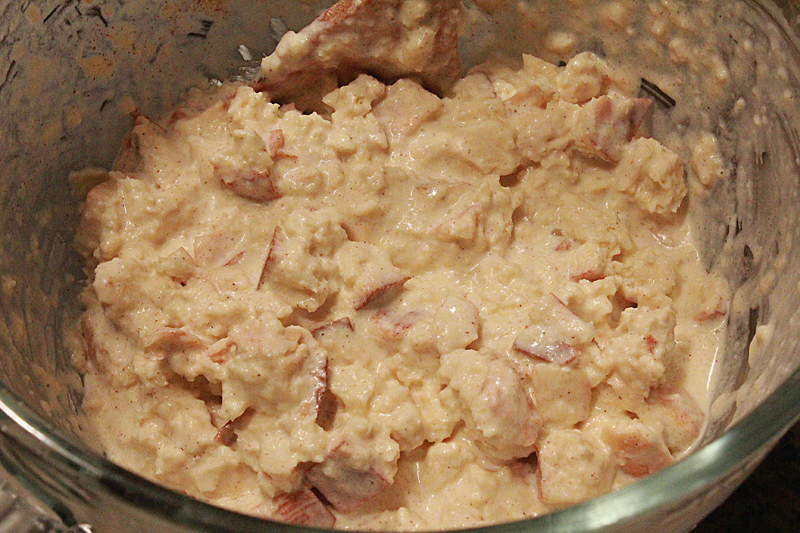
  1. Preheat oven to 350 degrees. Place bread cubes in a mixing bowl. Combine other ingredients and pour over bread cubes, stirring to saturate completely.
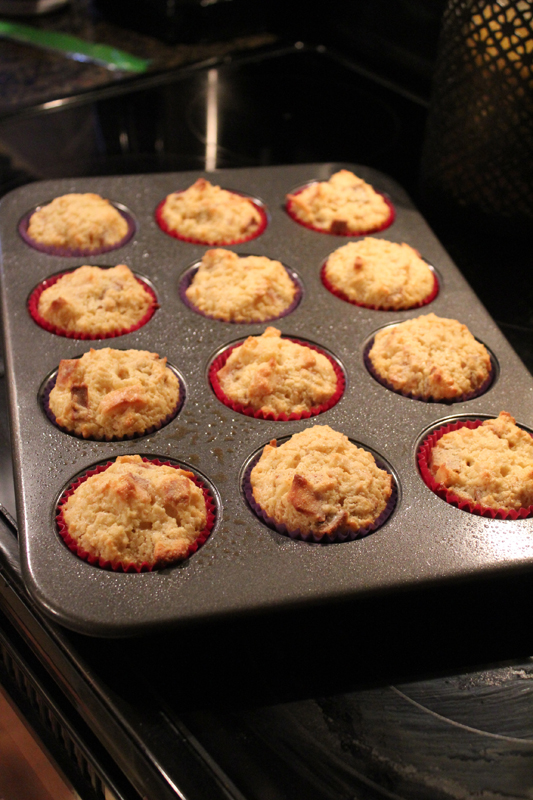
  2. Scoop batter into muffin cups. Bake for 30-35 minutes or until golden brown and inside is baked through.
  3. Allow to cool slightly and top with vanilla Cool Whip Frosting.


french toast cupcakes recipe 
 french toast cupcakes recipe

Whole Grain Waffles

So as a mom - it's a given that we end up cooking most of the meals in our house, but despite the fact that we've been a mom for almost 5 years, we still HATE the mornings.  I adopt a "don't talk to me", "don't touch me" motto every morning - and since our toddlers still doesn't understand the concept that weekends are meant to be sleeping in - we find ourselves still rising around 6:30/7am on a Saturday or Sunday morning.  We're up but it doesn't mean we like it - and it doesn't mean we want to be; so finding us in the kitchen may be a bit difficult; so this Christmas - we decided to invest in a cast iron waffle maker for our hubby with an attached note "Breakfast is all you from now on".  It's almost March, and I think he's used the waffle maker twice; and both times the waffles were so disgusting that our dog wouldn't even eat it.  So when we found this recipe for homemade waffle that is healthy we decided to share on behalf of my dear husband.  Let us know what you think?

Ingredients

  • 1 1/2 cups whole-wheat flour (not stone-ground)
  • 2 tablespoons toasted wheat germ
  • 2 tablespoons cane sugar
  • 1 1/2 teaspoon baking powder
  • 1/2 teaspoon coarse salt
  • 1 1/2 cups reduced-fat milk
  • 1/4 cup canola oil
  • 1 large egg
  • 1 teaspoon pure vanilla extract
  • Vegetable cooking spray
  • 1 pint strawberries, hulled and sliced
  • 1 cup low-fat plain Greek yogurt
  • Maple syrup, for drizzling

Directions

  1. Preheat waffle iron. In a large bowl, whisk together flour, wheat germ, sugar, baking powder, and salt. In another bowl, whisk together milk, oil, egg, and vanilla.
  2. Stir egg mixture into flour mixture and mix until just combined.
  3. Coat waffle iron with cooking spray. For deep, Belgian-style waffles, fill each cavity with 1/2 cup batter and cook until golden brown, 7 to 8 minutes (or according to manufacturer's instructions).
  4. Serve with strawberries, a dollop of yogurt, and a drizzle of syrup.

Monday, February 25, 2013

9 condiments instead of Sriracha

Let’s face the facts though; sriracha is now almost as mainstream as Tabasco sauce. Pretty soon McDonalds will be serving McSrirachas and you’ll be looking for the next cool condiment to slather on everything. Don’t worry, we’ve got you covered.

Harissa
Harissa is a red and spicy paste just like sriracha. It however, doesn’t come in a squeezy bottle. It is incredibly spicy thanks to the combination of hot peppers, red chili powder, and garlic that make up a majority of the sauce. The sauce has Tunisian origins and is used to flavor cous cous dishes as well as stews. We like to mix it with mayonnaise for a spicy sandwich spread.

Pomegranate Molasses
This Middle Eastern condiment is not actually molasses at all, but is instead is a thick syrup made from concentrated pomegranate juice and sugar. It is incredibly sweet and incredibly tart all in one. Plus it makes a bangin’ barbeque sauce or dressing when mixed with some vinegar and olive oil.

Akabanga
This hot sauce (and by hot we mean fiery hot) from Rwanda makes Sriracha look like a wimp. Workers have to wear facemasks when making the sauce, because it is that strong. Akabanga will add some serious firepower to anything you’re cooking up, just be sure to only use a drop or two at most if you ever want to feel your tongue again. Procuring a bottle might be a challenge for even the most determined spice addict as they are not sold in stores in the USA and difficult to purchase online.

Gochujang
If you like fermented foods then this Korean condiment is right up your alley. It’s made from fermented soybeans, glutinous rice, red chili, and salt and then is traditionally left to age for years in a clay pot. Its unique flavor profile makes it a great dressing for a bland salad.

Toum
Toum is that addictive garlicky white sauce served with chicken kebobs at Lebanese restaurants. It is basically an aioli on some serious garlic steroids. Recommended use: put it on everything, especially rice and French fries.

Ajvar
This is essentially the ketchup of the Balkans. It is made from red bell peppers, garlic, eggplant, and chili peppers. Many eat it as a stand-alone salad, or spread it on everything from sandwiches to pizza.

Banana Sauce
This condiment from the Philippine’s was invented when there was a ketchup shortage during WWII. It is actually made from mashed bananas combined with sugar, vinegar, and spices. Banana sauce is a crucial ingredient in Filipino style spaghetti and is basically used as ketchup would be on burgers, fries, etc.

Shichimi
Shichimi loosely translates to “seven flavor chili pepper” in Japanese, because there are literally seven flavors plus ground red chili pepper. Some of these additions include nori, roasted orange peel, and ground ginger. The Japanese add this to many dishes, especially those involving noodles.

Salsa Lizano
This Costa Rican condiment is a slightly sweet thin brown sauce (similar to the British HP sauce). It is a complex sauce including ingredients such as turmeric, mustard, carrots, and cumin. It’s supposedly great doused on eggs, cheeses, and curries.
Thanks Underground Eats

Thursday, February 21, 2013

Baba Ganoush

I recently introduced BabaGanoush to my husband when we went to a Mediterranean restaurant and now the man is HOOKED.  Baba Ganoush is made up mostly of fire-charred eggplants.  Did you know that another word for eggplant is aubergine.  We didn't either - we learned that today.  But here's one of our more favorite recipes.  Can't wait to try it at home.

Thanks Your Middle East

Baba Ganoush


Ingredients:
4 aubergines
6 garlic cloves
2 cups raw tahini - we found a great raw tahini recipe online for you guys to use which is simple
1/3 cup lemon juice
Salt, to taste
Olive oil
 A bunch of parsley or coriander leaves, thinly chopped.

1. Wash and char the aubergines one by one, on the stove’s open, high flames, till thoroughly tender on all sides. Some recipes call for frying or baking the aubergine in the oven, but this is heresy. Broiling the aubergine on an open fire gives it the special, smoky taste that makes the greatness of the Baba Ganoush. If you fear the mess to your stove, line it with aluminium foil. Otherwise, be ready to settle for compromise. And if you really want to get the most of the smokiness, char the aubergines for at least 10 to 15 minutes, and then set aside to cool.

2. After the aubergines have cooled, half them and scoop out the aubergine flesh (preferably with a wooden or a plastic utensil, as metal would blacken the aubergine flesh and alter its flavour). If some of the aubergines’ black skin sticks to the flesh don’t fret – it’s only for the best and your palate will thank you for it, but don’t get carried away and leave too much of it, or your whole dish will taste of burnt aubergine skin. Mash it and let it sit in a colander for a while, to drain the fluids.

3. Mix together in a serving bowl the aubergine flesh with the crashed garlic cloves, the raw Tahini, the lemon juice and the salt. Stir together, taste, and adjust seasoning.

4. Before serving, top with olive oil and the minced herbs.
Since the recipe varies from one region to another, feel free to do the same and experiment, replacing some of the Tahini with yogurt, adding spring onion, or toasted cumin seeds. Another tradition is to add pomegranate seeds or pomegranate molasses on top of the dish, for an added sweet-sour tang.


Tuesday, February 12, 2013

Spinach & Artichoke Chicken

Spinach Artichoke Chicken Recipe from addapinch.com
Oh my goodness gracious is it amazing! Think your favorite spinach artichoke dip all over the top of baked chicken.

There’s something so comforting about this spinach artichoke chicken that it has really become one of our favorite ways to eat chicken now. While the ingredients list doesn’t specify, I like to use lower fat ingredients for the topping such as part-skim mozzarella cheese, fat-free Greek yogurt, and a light mayonnaise. Of course, use what you prefer!

And luckily, it is one of the easiest things to make that you can think of!
Spinach Artichoke Chicken Recipe from addapinch.com

You just throw your chicken into a baking dish, then mix up your spinach artichoke topping and pour it on top. Bake it and then watch it disappear.

The chicken turns out so flavorful and tender. My mouth is watering just thinking about it.
It’s great to get kids to eat their vegetables, too.
 
Spinach Artichoke Chicken makes for a simple, delicious meal that everyone will love.
 Serves: 8
 
Ingredients
  • olive oil spray
  • 8 chicken breasts
  • 13.75 oz artichoke hearts packed in water, drained
  • 10 oz frozen spinach, thawed and squeezed
  • 2 shallots, chopped
  • 1 clove garlic, minced
  • ½ cup Greek yogurt
  • ½ cup mayonnaise
  • ½ cup Parmesan cheese
  • ½ cup shredded mozzarella cheese

Instructions
  1. Preheat oven to 375º F. Spray baking dish with olive oil nonstick baking spray.
  2. Place chicken into baking dish. Salt and pepper chicken and then bake 15 minutes.
  3. Meanwhile, in a medium bowl, combine remaining ingredients and then pour on top of chicken. Bake 20-25 minutes.
  4. Let stand about 5 minutes before serving.

Saturday, February 2, 2013

Football Strawberries

super bowl snack

Super Bowl Snack: Football Chocolate Covered Strawberries

It's time for the Superbowl, here's a fun way of serving a snack for your get-together...Take a look at these adorable Football Chocolate Covered strawberries! It is super easy and the perfect addition to your party!
What you will need:
  • Strawberries
  • Chocolate (baking chocolate or chocolate chips work great)
  • White Icing
Directions:
  • Melt the Chocolate
  • Dip the Strawberries in the chocolate
  • Draw a football onto the strawberries!
  • Enjoy!

Thursday, January 31, 2013

Cinnamon Bread

CINNAMON BREAD
(makes 2 loaves)
Batter:
1 cup butter, softened
2 cups sugar
2 eggs
2 cups buttermilk or 2 cups milk plus 2 tablespoons vinegar or lemon juice
4 cups flour
2 teaspoons baking soda
Cinnamon/sugar mixture:
2/3 cups sugar
2 teaspoons cinnamon 
Cream together butter, 2 cups of sugar, and eggs.  Add milk, flour, and baking soda.  Put 1/2 of batter (or a little less) into greased loaf pans (1/4 in each pan).  Mix in separate bowl the 2/3 c sugar and cinnamon.  Sprinkle 3/4 of cinnamon mixture on top of the 1/2 batter in each pan.  Add remaining batter to pans; sprinkle with last of cinnamon topping.  Swirl with a knife.  Bake at 350 degrees for 45-50 min.  or until toothpick tester come clean.  
Cool in pan for 20 minutes before removing from pan.
I have also made this bread in muffin tins which made it a little easier to freeze and take out as needed.

Cheesy Pull-Apart Bread

Superbowl is coming on Sunday, and it's the best excuse to eat "bad for us food", drink lots of beer and sit with good company.  Here's a recipe we're going to be making this Sunday.

Cheesy Pull-Apart Bread
If the prospect of filling your belly with nothing more than carbs and cheese excites you as much as it excites me, then you need to run, not walk, into the kitchen and make this bread. I am the certified queen of the carbs and cheese combo. Give me a loaf of bread and a hunk of cheese and I’m all set. Imagine cheesy garlic bread on steroids… that you can pull apart with your fingers. Yes, it’s every bit as amazing as you’re imagining it to be.

Cheesy Pull-Apart Bread
The best part about this little gem? It’s seriously the easiest thing to prepare.
Take one loaf of bread… cut it up into a grid pattern… pour a mixture of melted butter, garlic and scallions into all of the crevices, cover with foil and bake.
Take it out of the oven… stuff and cover it in shredded cheeses and pop it back into the oven, uncovered.
Pull-Apart Cheesy Bread
Voila! Crusty, cheesy awesomeness, right on your kitchen counter.
Cheesy Pull-Apart Bread
You don’t need me to tell you that you won’t be able to stop eating this. I dare you to try. Three of us demolished this entire loaf and, truth be told, it would have been very easy for only two of us to do it. In situations like this, it’s a good thing that I was taught to share at an early age.
I’m looking forward to consuming many, many more loaves of this cheesy bread. You owe it to yourself and those you feed to make at least one!
Cheesy Pull-Apart Bread

Cheesy Pull-Apart Bread

Yield: 4 to 8 servings
Prep Time: 10 minutes
Cook Time: 25 minutes
Total Time: 40 minutes
This cheesy pull-apart bread has been made in countless forms; this cheesy garlic version is my favorite.

Ingredients:

1 large loaf or boule-style Italian bread (Sourdough or French could also work)
½ cup butter (unsalted or salted is fine), melted
1 clove garlic, minced
1 bunch scallions, trimmed and thinly sliced
8 ounces sharp Cheddar cheese, shredded (about 2 cups)
8 ounces Monterey Jack cheese, shredded (about 2 cups)

Directions:

1. Preheat oven to 350 degrees F. Spray a sheet of heavy-duty foil with non-stick cooking spray and set aside.
2. Cut a cross-hatch pattern into the top of the bread by slicing ½-inch grid lines into the bread, stopping about ¼-inch from the bottom of the bread so that it stays together. Place the bread on the piece of foil that has been sprayed.
3. Stir together the melted butter, garlic and scallions.
4. Gently separate the bread with your fingers, then spoon the butter mixture in all of the seams, making sure it is evenly distributed among the whole loaf. Wrap the loaf up in the foil and place on a baking stone or directly on the oven rack and bake for 10 minutes.
5. Remove from the oven and increase the oven temperature to 425 degrees F.
6. Open the foil and sprinkle the shredded cheese on top of the bread. There will be a lot of cheese, so try to push down as much as you can in between all of the crevices in the bread. Leave the foil open and return it to the oven. Bake until the cheese is completely melted, bubbling and starting to brown on top, about 15 minutes. Let stand for 5 minutes before serving, then dig in!

Wednesday, January 30, 2013

Nian Goa for Chinese New Year

Nian Gao is considered good luck during Chinese New Year, and therefore something every family usually buys to eat.  This year - we're going to make our own.  Here is a simple recipe you can use.


Nian Gao, or Chinese New Year's Cake

Ingredients
  • 1-1/2 cups water
  • 2-1/2 cups dark brown sugar, packed
  • 1/2 cup vegetable oil
  • 4-1/2 cups sweet rice flour (Available in Asian specialty markets)
  • 3 dried red dates (Available in Asian specialty markets
Instructions
  1. In a large saucepan, boil the water, add the sugar and the oil, and stir just until the sugar is dissolved. Set aside to cool for about 20 minutes.
  2. Mix the rice flour thoroughly with the cooled liquid and transfer the mixture into an 8-inch round aluminum pan. (The aluminum pans at supermarket salad bars work very well for this). Set the dates in the middle.
  3. Put an inch of water into a wok, a large pot, or a large flat pan and carefully set the pan of batter in the water. Cover lightly with aluminum foil and gently steam the mixture for about 50 minutes. Take care not to let the water boil over into the nian gao.

    Steaming can also be done in the oven: set a large pan of hot water on the middle shelf of a 375-degree oven and carefully place the nin gao, covered loosely with foil, in the hot-water bath. The water should be gently bubbling. Steam for about 50 minutes or until the mixture is firm in the middle. Cool thoroughly before cutting the nian gao into diamond shapes. Makes 12 servings.

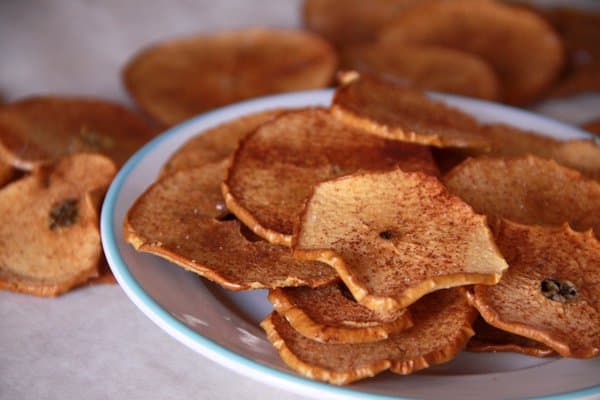
Baked Apple Chips with Cinnamon Sugar

We saw this recipe from Foodlets.com and knew we had to borrow it for our blog.  I know my kiddies always ask me to buy chips whenever we're at the grocery store (that's why I avoid bringing them whenever I can).  While I sometimes give in - most of the time, I rather them not put a bunch of processed crap in their system.

These apple chips are easy to make, will make your house smell delicious and actually good for them.


 BAKED APPLE CHIPS WITH CINNAMON SUGAR


Ingredients
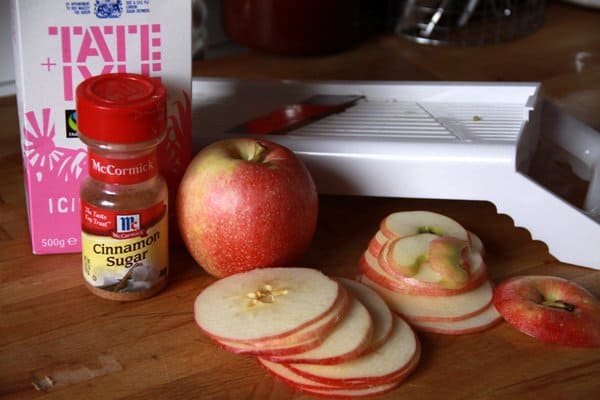
  • 2 apples (golden delicious, gala or other fall baking apples are best)
  • 2 teaspoons powdered sugar
  • 2 teaspoons cinnamon sugar
Instructions
Preheat oven to 200 degrees.
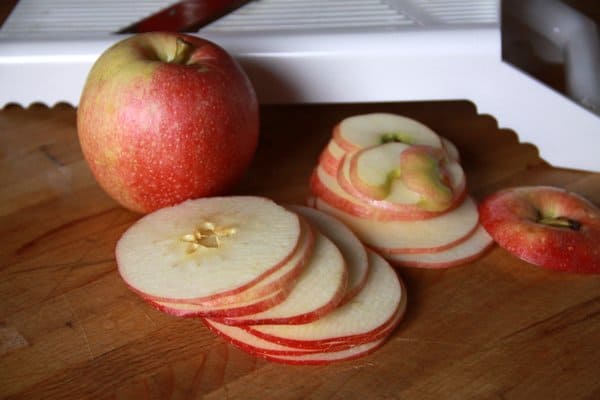
Wash and slice apples horizontally, using a mandolin if possible. Don’t bother coring, just remove any pieces of seeds.
On a baking sheet lined with a non-stick sheet such as Silpat, or parchment paper, sprinkle powdered sugar in a very thin, even layer. Line up apple slices, side by side as closely as they’ll fit in. Sprinkle cinnamon sugar on top. Place in the warm oven for at least 90 minutes, rotating once halfway through. For sweeter and chewier apples, remove at this point. For crispier apples with a more toasted flavor, cook for the full 2 hours.
Note: the “chips” may not be crispy to the touch when you first remove them from the oven. Remove them from the baking sheet and allow to cool on a wire rack or counter space. They’ll crisp up a bit here. Also, the thicker you slice the apples, the chewier the result.

Monday, January 28, 2013

Super Bowl: Root Beer Pulled Pork Recipe

Your next Super Bowl party will certainly be a big hit with Root Beer Pulled Pork! It takes about twenty minutes to prep and within 8 to 10 hours the pulled pork turns out amazing!
Ingredients
  • 1 medium onion, chopped
  • 1 garlic clove, minced
  • ½ cup ketchup
  • 1/3 cup cider vinegar
  • 1 (4 ounces) tomato paste
  • 1 tablespoon paprika
  • 2 tablespoons Worcestershire sauce
  • 2 tablespoons yellow mustard
  • 1 (12 ounce) can or bottled root beer (do not use diet root beer)
  • 4 lbs boneless pork shoulder roast
  • 12 buns
Instructions
In a slow cooker, mix everything together except the pork.
Add the pork, stir well, and cover.
Cook on low for 8-10 hours.
An hour or two before it is done shred the pork with two forks in the slow cooker.
Mix well. The sauce will be a little runny but the longer you let the meat sit the more it will soak up the juices.
Serve on hamburger buns.


Sunday, January 27, 2013

Frozen Strawberries & Yogurt

Valentines Day Ideas

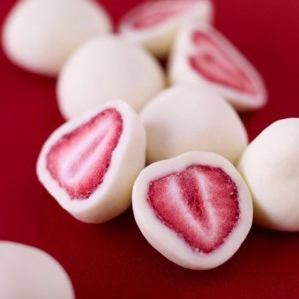
Valentines Day Ideas: Frozen Strawberries & Yogurt

I saw this adorable snack and thought it was perfect for this time of year with Valentine’s Day right around the corner. It is super easy to make and is a very healthy snack – especially with all of the yogurt deals we get great deals on! These are the perfect after school snack!
What you will need:
  • Strawberries
  • Yogurt (Greek/flavored anything you would like)
  • Freezer
Directions:
  • Optional: Cut the strawberries in half
  • Dip the Strawberries in yogurt
  • Put them in the freezer
  • Enjoy!

Friday, January 25, 2013

Spinanch & Egg Bake

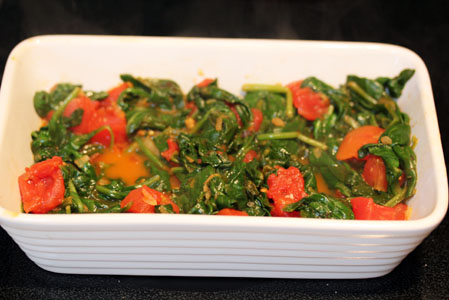
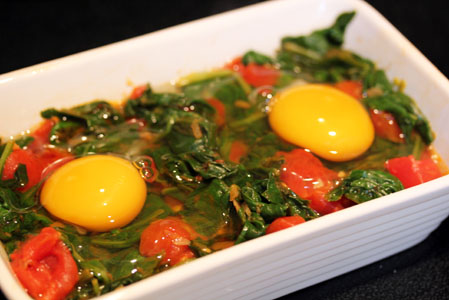
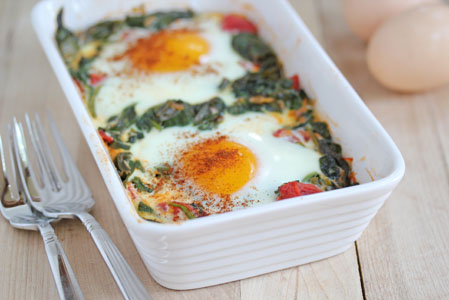
baked egg with spinach 7 Baked Eggs with Spinach, Tomatoes and Garlic   Grow. Eat. $ave.
An egg baked on a bed of spinach, tomatoes and garlic. Sounds so fancy and gourmet!!!

First up is spinach.
baked egg with spinach 1 Baked Eggs with Spinach, Tomatoes and Garlic   Grow. Eat. $ave.
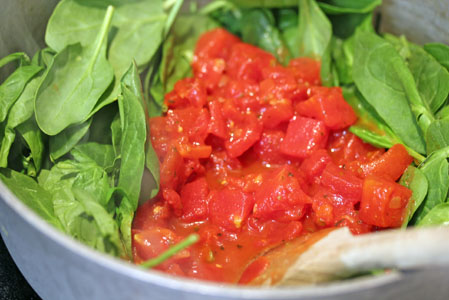
First saute it with some garlic.
baked egg with spinach 2 Baked Eggs with Spinach, Tomatoes and Garlic   Grow. Eat. $ave.
Add some diced (or fresh) tomatoes.
baked egg with spinach 3 Baked Eggs with Spinach, Tomatoes and Garlic   Grow. Eat. $ave.
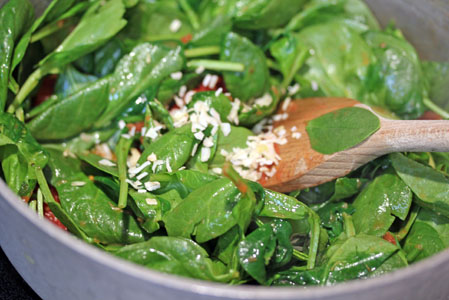
And some minced onion.  Cook it down.
baked egg with spinach 4 Baked Eggs with Spinach, Tomatoes and Garlic   Grow. Eat. $ave.
Place into a small baking dish…or you can do 1 egg each in ramekins.
baked egg with spinach 5 Baked Eggs with Spinach, Tomatoes and Garlic   Grow. Eat. $ave.
Create wells for the eggs, then crack 1 at a time into each well.
(This dish was the perfect size for 2 eggs.)
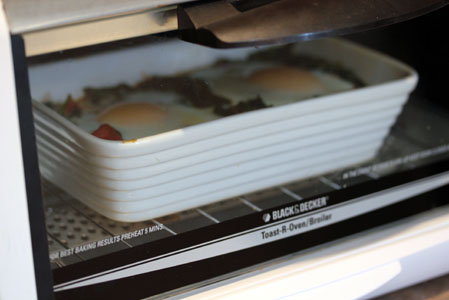
baked egg with spinach 6 Baked Eggs with Spinach, Tomatoes and Garlic   Grow. Eat. $ave.
Bake.

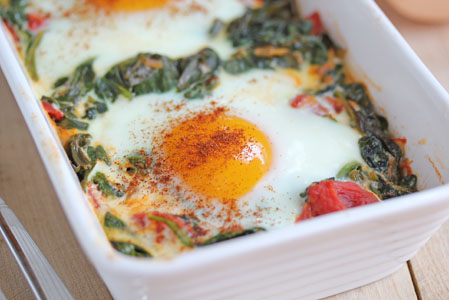
baked egg with spinach 8 Baked Eggs with Spinach, Tomatoes and Garlic   Grow. Eat. $ave.
Give a little sweet flare with some paprika.
And enjoy a fancifully gourmet breakfast!!!

Baked Eggs with Spinach, Tomatoes and Garlic

Yield – 4 servings
Preparation Time – 15 minutes
Cooking Time – 10 minutes

Ingredients

  • 2 Tbsp olive oil
  • 2 garlic cloves, crushed
  • 10 oz. fresh spinach
  • 1 15 oz. can diced tomatoes, drained
  • 2 Tbsp minced onion
  • 4 eggs
  • Salt and pepper
  • Paprika, sprinkle as garnish
  • Fresh fruit as side dish

Directions

  • Preheat oven to 350.
  • To a large skillet or saucepan, add the olive oil and saute the garlic for a minute, before adding the spinach.  Toss the spinach around for a minute, then add the diced tomatoes.  Toss together and then add the minced onion.  Let simmer until most of the liquid has cooked off, about 5-7 minutes.
  • Place the sauteed spinach into an ovenproof, creating divets for the eggs.  Crack 1 egg into each hole.
  • Bake the spinach and eggs for about 8 to 10 minutes, or until egg whites have turned white.
  • Once cooked, remove from the oven and sprinkle with salt and pepper and paprika.
  • Serve with fresh fruit for a well balanced breakfast!

Wednesday, January 23, 2013

Indian Chicken Curry

The slow cooker is one of the most popular method of cooking during the winter season.  When most people think of Indian cooking, the first dish that comes to mind is a good chicken curry. 

This recipe makes for 6 servings.

Ingredients  
  • 3 pounds of skinless whole chicken cut in about 8 pieces - boneless is fine to use. 
  • 1 large yellow or red onions cut into 8 pieces
  • 2 medium tomatoes quartered
  • 1 4inch piece gingerroot, cut into 1-inch pieces
  • 10 cloves garlic
  • 1 tablespoon salt
  • 1 tablespoon turmeric
  • 1 tablespoon garam masala
  • 1/4 cup vegetable or canola oil
  • 1 cup plain yogurt
  • 1 tablespoon red chili powder
  • 1 cup dried methi leaves (dried fenugreek leaves)
  • 1 cinnamon stick
  • 4 green cardamom pods
  • 4 cloves
  • 4-6 green Thai or Serrano Chiles or cayenee Peppers, stems removed, halved lengthwise
  • 1/2 cup boiling water (optional)
  • Basmati or brown rice, cooked, warm
  • 1/2 cup fresh cilantro, chopped for garnish
1) Place chicken in the slow cooker
2) Process onions, tomatoes, gingerroot, and garlic till smooth.  Transfer paste to a bowl.  Whisk in the salt, turmeric, garam masala, oil, yogurt, red chili powder, and methi.  Pour over the chicken.
3) Add cinnamon stick, cardamom pods, cloves, and green chili peppers, mixing gently, cover and cook on low 8 hours.  For more brothy curry, add boiling water during the last 30 minutes of cooking, if desired.
4) Discard whole spices.  Serve over rice and garnish with cilantro.

Wednesday, January 2, 2013

Mussels with White Wine Sauce & Garlic

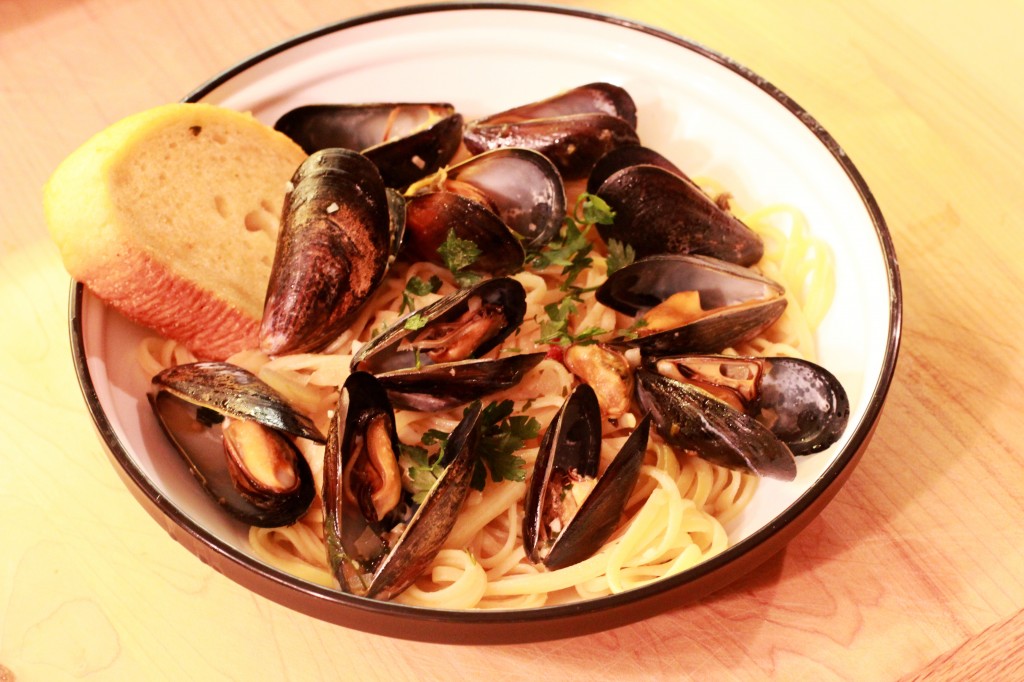
mussels with wine and garlic sauce

Now that the holidays are over, I know one of my New Year's Resolution is to save money and eat at home more.  My husband and I love seafood, and surprisingly this dish is really not that hard to make and doesn't cost much.  Mussels usually come in at $4 a pound, and a bottle of wine will usually go between $5- $10.  So for $20 - you can have an excellent meal at home.  

Mussels with Wine and Garlic Sauce
Prep time: 
Cook time: 
Total time: 
Serves: 3-4
 
Easy and surprisingly frugal!
Ingredients
  • 2 lb. mussels (make sure you discard any that are gaping open)
  • 2 Tbsp. extra virgin olive oil
  • 1 Tbsp. butter
  • 6 cloves garlic, minced
  • ¼ C. onion, minced (or shallots)
  • ¾ C. dry white wine
  • ⅔ C. chopped flat leaf parsley
  • 1 lb. linguine noodles
Instructions
Prepare linguine according to package directions. In a large skillet with a lid, melt the butter. Add olive oil and sauté the garlic and onions until translucent. Add the wine and mussels and about half of the parsley. Cover and heat until mussels have opened (about 8-10 minutes). Add remaining parsley as a garnish. Serve mussels and wine sauce over linguine.