Wednesday, December 12, 2012

Decorate a cake - an easy way....

(Thank you Moeys Heart & Heart for this AMAZING tutorial)
 
This is a tutorial to show you how to decorate a cake that makes you look pretty clever.
The beauty of this method is that you can put anything you darn well want on a cake. Your kid likes a certain team and you don't trust Stuffmart Bakery?

No problemo. All you need is a picture off the webz (or a coloring book page, or a drawing you did yourself) and you can make any design you want.

In this case, Gater wanted a "Dora/Princess" cake. I didn't know how I would do a "Dora/Princess", but all I had to do was spend 10 seconds on Google, ("princess dora coloring page") and there was a coloring page all ready to print out.

First, bake your cake and let it cool thoroughly. It needs a flat top, so do what you have to to make it flat.
IMG_5325cakeicedtb
Make your icing; a buttercream made with butter is best. You want an icing that is smooth and soft, but that hardens in the freezer. You will probably want to make a double batch to be sure you have enough to divide into all the colors you need.

*When you make your icing, you will want to sift the powdered sugar and mix the icing up quickly so you don't get lumps. You don't want lumps clogging up your icing tips in your detail work. Your icing should be of medium thickness, not too stiff. Soft peaks.*

Ice your cake. You want a flat-topped cake. The icing job does not have to be perfect, just flat.
IMG_5317picture
Print out a coloring page, and make sure it is the right size for the top of your cake. You need at least 1/2" space around the edge of your design on the cake.
*your design will be reversed, so if you are doing a team logo or similar, you will want a mirror image of your original printout.*

It is a good idea at this stage to decide how many colors you want to use in your finished design. You might want to mark those colors in the appropriate areas on your coloring page with markers. I didn't this time, because the design was simple and I was lazy.

Trim your coloring page, and tape it to the back side of a flat piece of glass. I always use glass from a spare picture frame.
IMG_5319waxpaper
Tape a similarly-sized piece of wax paper to the front of the glass. Now you have a coloring page/glass/wax paper sandwich.
IMG_5326icingtb
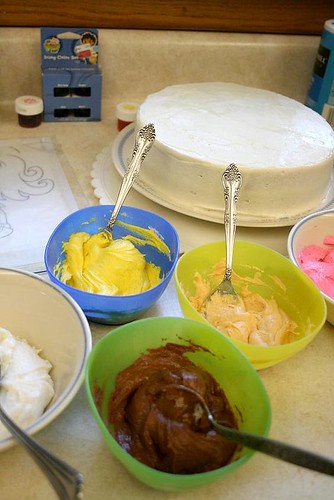
Mix up the colors you will need for your design. Don't forget to include a dark color for outlines and details.

*I prefer to use paste colors because they are vibrant and easily blendable, they don't thin out your icing, and they last pretty close to forever. One little jar of each of a few basic colors will last you for years. Sometimes you get lucky and find a marked-down pack of specialty colors, like I did. If the specialty pack has a couple good basic colors in, or ones that you are likely to use in any case (for example, the Diego colors I bought for $1.99 had a skin color, blue, black, and brown -- all good colors,) by all means -- pick those suckers up, and some for your mommy friends too.*
IMG_5348icingtb
Now the fun part! Fill your icing bags. For the finest details, use a #1 decorating tip -- and you don't have to get fancy if you don't have actual decorating tips, they just make it easier. As you can see in the picture below, for some of the colors I just used ziploc bags with the tiniest speck of the corner cut off.

But for the initial details, you are better off with an icing bag and a #1 decorating tip if you can get one.
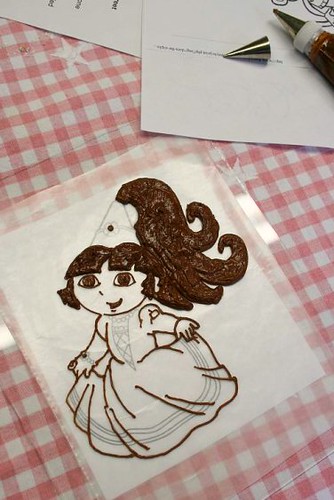
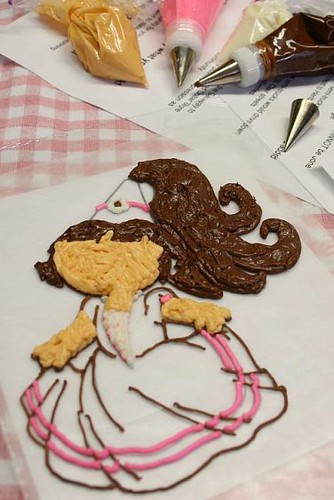
Now, trace over the outlines that you want to see on your finished product. This bottom layer will be the top layer -- the one you see -- on your design.
IMG_5349doraicingtb
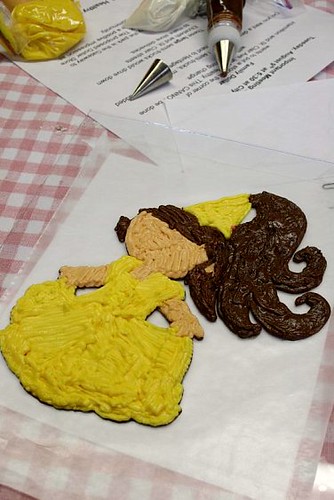
Once your bottom detail layer is established, you can fill in larger areas over the details with other colors of icing. You can't go back in and put details in at this stage if you leave them out, so think logically, one step at a time. It isn't hard and you can fix things later if you need to, so don't stress too much about it.
IMG_5350doraicingtb
Color in all the areas with the icing layers to a depth of about 1/4 inch. Fill in right to the edges and on top of your detail lines, so your whole design is supported by that 1/4" thickness of icing.

You can hold your glass up to the light to see if there are any pinpricks of light shining through your icing design, so you can fix those thin areas before you go on.

*This is when your children will come in and inform you that you have screwed up and your icing job was a good try, but it does not look like Dora. You may chuckle to yourself at how ignorant impertinent amazed they will be when you reveal the final design.*

Now, take the whole coloring page/glass/wax paper/icing design sandwich, and slip it into the freezer. You want it in the freezer until the icing is hard to the touch. I don't really know how long that takes, but I'd venture at least fifteen minutes.

IMG_5352cakedecptb
Now is a good time to busy yourself with making the sides and bottom edge of the cake look pretty, or doing the dishes, or having a beer, or whatever.
IMG_5353dorapictb
Now -- the magic! Take your coloring page/glass/wax paper/icing design sandwich out of the freezer and make sure the icing is nice and hard.

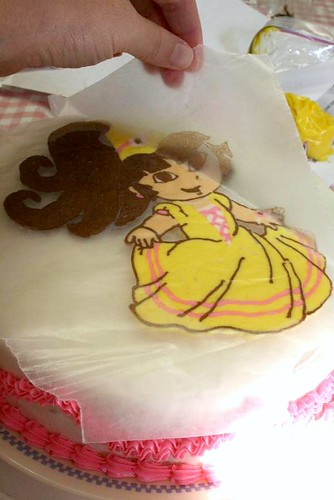
Un-tape the wax paper/icing, and quickly but carefully, up-end your design onto the cake. Press it down a little so it sticks.
Then, also quickly but carefully, before the design softens, peel back the wax paper to reveal the design.

Now, make the top edge of the cake look pretty with some stars or whatever (a #16 tip is good to use for decorating the sides and edges) and pipe your message.

Voila! You are a genius!
Or a broke monkey!
IMG_5355doraicingtb

Friday, December 7, 2012

Cookie Dough Bites

cookie dough bites

I don't know anyone who doesn't like chocolate chip cookie dough. These are the perfect treat for dough lovers made without eggs and bite sized.
Hands-On Time: 20 minutes
Ready In: 1 hour
Yield: 2 dozen cookies
Ingredients
    1 cup salted butter, softened
    1½ cups packed light brown sugar
    1 teaspoon vanilla extract
    2 cups flour
    6 ounces miniature chocolate chips
Directions
  1. Cream butter and sugar together.
  2. Add remaining ingredients and mix well -- use your hands to get it together the best.
  3. Roll into 1-inch balls.
  4. Refrigerate until firm, about 30 minutes. Dip in chocolate, drizzle with chocolate or eat as is -- equally delicious no matter what!
  5. Let stand at room temperature for about 10 minutes before serving.
  6. Store in the refrigerator.

Thursday, December 6, 2012

Oreo Cookie Cookie


What's better than a cookie? A cookie with a cookie inside of it!

That's right, these cookies actually have cookies as an ingredient! These definitely are up in the ranks as one of my all time favorite cookies, ever.


I used a recipe called Best, Big, Fat, Chewy Chocolate Chip Cookies from All Recipes. Any time the name of a dessert has over 10 syllables it has to be good, right? They have over 3000 reviews so I've been dying to try them. But of course I couldn't leave good enough alone, so I threw in a bunch of crushed up oreos (double stuff, of course). This might be the best idea I've ever had.


The cookie recipe itself comes together really easily. It's very similar to Alton Brown's "Chewy" (my previously declared favorite cookie) but with AP flour instead of bread flour and A LOT less butter. And let me warn you right now, the cookie dough is to die for! I'm not usually one for eating raw cookie dough out of the bowl; I prefer the finished product. But with this dough I could not keep away!


Recipe - Makes 20 - 30 cookies*
Adapted from AllRecipes
Ingredients:
  • 2 cups all-purpose flour
  • 1/2 teaspoon baking soda
  • 1/2 teaspoon salt
  • 3/4 cup unsalted butter, melted
  • 1 cup packed brown sugar
  • 1/2 cup white sugar
  • 1 tablespoon vanilla extract
  • 1 egg
  • 1 egg yolk
  • 2 cups semisweet chocolate chips
  • 20 oreos, crushed
Directions
  1. Preheat the oven to 325 degrees F (165 degrees C). Grease cookie sheets or line with parchment paper.
  2. Sift together the flour, baking soda and salt; set aside.
  3. In a medium bowl, cream together the melted butter, brown sugar and white sugar until well blended. Beat in the vanilla, egg, and egg yolk until light and creamy. Mix in the sifted ingredients until just blended.
  4. Add in the crushed oreos. Beat on low speed for just a few seconds to break up the oreos in the dough.
  5. Stir in the chocolate chips by hand using a wooden spoon. Drop cookie dough 1/4 cup at a time onto the prepared cookie sheets. Cookies should be about 3 inches apart.*
  6. Bake for 15 to 17 minutes in the preheated oven, or until the edges are lightly toasted. Cool on baking sheets for a few minutes before transferring to wire racks to cool completely.**
**Thank you Sugar Cooking for this wonderful recipe

Cookies and Cream Cheesecake Cupcakes

Until making these cookies and cream cheesecake cupcakes, with an Oreo on bottom, I hadn’t eaten an Oreo since I was a kid. This recipe not only brought back chocolatey childhood memories but also reminded me of how much I like Oreos. I didn’t think I liked them that much now that my palate has, ahem, matured, but I was wrong. Very wrong. And I also realized that it is very dangerous to not only make these cupcakes but to have a package of Oreos in the pantry. As I write this post the cupcakes have been long eaten and gone which is making me very sad. Looks like I’m off to the store to buy some Oreos…

Cookies and Cream Cheesecake Cupcakes

Yield: 30 cupcakes

Ingredients:

42 cream-filled sandwich cookies, such as Oreos, 30 left whole, and 12 coarsely chopped
2 pounds (4 8-oz packages) cream cheese, room temperature
1 cup sugar
1 tsp vanilla extract
4 large eggs, room temperature, lightly beaten
1 cup sour cream
Pinch of salt

Directions:

Preheat oven to 275°F. Line standard muffin tins with paper liners. Place 1 whole cookie in the bottom of each lined cup.
With an electric mixer on medium high speed, beat cream cheese until smooth, scraping down sides of bowl as needed. Gradually add sugar, and beat until combined. Beat in vanilla.
Drizzle in eggs, a bit at a time, beating to combine and scraping down the sides of the bowl as needed. Beat in sour cream and salt. Stir in chopped cookies by hand.
Divide batter evenly among cookie-lined cups, filling each almost to the top. Bake, rotating pan halfway through, until filling is set, about 22 minutes. Transfer to wire racks to cool completely. Refrigerate at least 4 hours (or up to overnight). Remove from tins just before serving.

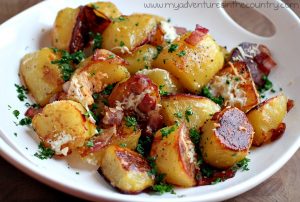
Oven Roasted Potatoes


Oven Roasted Potatoes (Adapted from epicurious.com)

1 Tbsp olive oil
1/2 lb hickory smoked, thick sliced bacon
3 1/2 lbs Yukon Gold Potatoes
2 cloves garlic, minced
1/4 cup Parmigiano-Reggiano, freshly grated
coarse salt
fresh ground pepper
fresh parsley

Directions:
Scrub potatoes and place in a large pot.  Fill pot with water until potatoes are covered by 2-3 inches of water.  Bring water to a boil and cook for 12-15 minutes or until potatoes are fork tender.  My potatoes were fairly large, so this took close to 15 minutes.
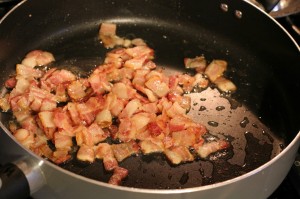
Meanwhile, partially freeze bacon for easier cutter.  (Ten minutes in the freezer works well.) Slice bacon strips in half, then cut into 1/2-inch pieces.  I like to cut my bacon prior to cooking.  It’s easier to work with in the skillet and easy to drain with slotted spoon.


Cook bacon in a skillet until golden, but still flexible.  You don’t want it crunchy.  Remove cooked bacon onto a plate lined with paper towels.  Reserve the bacon drippings.
Check potatoes and if fork tender, drain and allow to cool.  If making this recipe again, I would peel the potatoes before I boiled them or try leaving the skins on all-together.  Yukon Golds have a relatively thin skin, so I think this would have added a nice look and texture to the potatoes.
While potatoes are cooling, preheat the oven to 425° and mince the garlic and parsley.  Also, grate the Parmigiano-Reggiano.
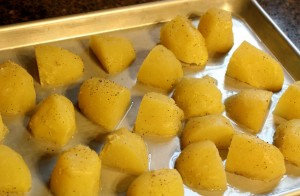
Next, prepare the baking sheet by brushing 1 tablespoon of olive oil and half the bacon drippings on the bottom of the pan. I used a fairly large cookie sheet for this and it worked well.
Once the potatoes are cool, peel and cut in half, or quarter if potatoes are large.
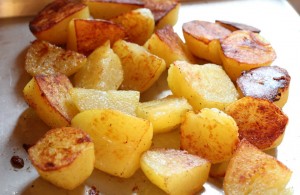
Place cut side down on prepared pan and sprinkle with course salt and fresh ground pepper.   Place in 425° oven for 35-40 minutes.  Rotate potatoes halfway through the baking time to ensure an even color.  I did not do this and some of mine were more golden than others.

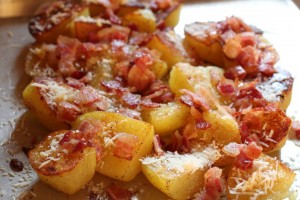
Reduce temperature to 375°, turn potatoes over and sprinkle with the bacon, garlic, and Parmigiano-Reggiano.
Add more salt and pepper if desired.  Return to oven for an additional 15-20 minutes or until potatoes are evenly browned and cheese is melted.  Remove from oven and sprinkle with fresh parsley.  Makes 4-6 servings, depending on serving size. Serve immediately!

Wednesday, December 5, 2012

Apple Pie Rolls

Have an apple pie craving? I have just the thing…

First, you take some apples and some cinnamon and some sugar and some lemon juice and mix it all up. Then you take your trusty egg roll wrapper and brush egg wash around all four sides.

Baked Apple Pie Egg Rolls
Then you give it a little tuck here and a fold there, like so.
Baked Apple Pie Egg Rolls
Then you roll the pretty little thing up all nice and neat.
Baked Apple Pie Egg Rolls
Repeat.
Baked Apple Pie Egg Rolls
Bake until they’re all golden and oozy (and just before they’re done, brush them with some melted butter and sprinkle with cinnamon sugar). Because that’s just how we roll.
Baked Apple Pie Egg Rolls
You can do that, can’t you? I knew you could. Because you’re awesome. Then you will have golden, crispy egg rolls filled with perfectly cooked, steamy fresh apple pie filling. Good grief, Charlie Brown!
Baked Apple Pie Egg Rolls
Can’t you just smell it? It’s divine. Make some. The whole family will love it.
Baked Apple Pie Egg Rolls
Yield: 10-12 egg rolls
Baked Apple Pie Egg Rolls
Adapted from Chef-in-Training, originally from Spoon Fork Bacon
Ingredients
  • 2 apples, peeled and diced (I used Granny Smith)
  • 1 lemon, juiced
  • 1/3c sugar
  • 4T flour
  • 2t cinnamon
  • 1/4t allspice
  • 1/8t salt
  • 10-12 egg roll wrappers
  • 1 egg, beaten
  • 1T butter, melted
  • cinnamon sugar

Instructions
  1. Preheat oven to 375. Line a large baking sheet with parchment paper and lightly spray the parchment with non-stick spray.
  2. In a bowl, stir together the apples, lemon, and sugar. Add the flour, spices, and salt.
  3. Beginning with one egg roll wrapper, lay it out on a work surface (I used a cutting board) and brush egg wash around each edge. Scoop about 2 tablespoons of apple filling onto one edge. Fold in the sides and roll up the egg roll tightly. Place on the parchment-lined baking sheet. Repeat until all the filling has been used.
  4. Bake for 20 minutes. Remove from oven and brush each egg roll with melted butter, then sprinkle each with cinnamon sugar. Return to the oven for 5 more minutes.
  5. Serve hot with vanilla ice cream or sweetened freshly whipped cream.
Notes
Egg roll wrappers are crispy when baked and the interior layer is chewy. If you prefer your egg rolls fried, these would also be delicious deep fried, then dusted with cinnamon sugar after frying.

Porcini-Red Wine Butter


Porcini-Red Wine Butter Melt coins of this umami-rich butter on grilled steaks, salmon fillets, or chicken breasts.

Ingredients

  • 1/2 cup (1 stick) unsalted butter, room temperature
  • 2 tablespoons finely chopped dried porcini mushrooms
  • 1 tablespoon red wine
  • Kosher salt
  • Ingredient Info

    Find dried porcini mushrooms in the produce section of better supermarkets and at specialty foods stores and Italian markets.

Preparation

  • Put butter on a work surface and sprinkle with mushrooms. Drizzle with wine and season with salt. Using a knife, finely chop together until well combined. Transfer butter mixture to a sheet of parchment paper, wax paper, or plastic wrap, placing on edge closest to you. Fold paper over and roll into a cylinder, twisting the ends; wrap airtight in foil. Chill until solid. Butter will keep refrigerated for up to 2 weeks or frozen for up to 3 months.

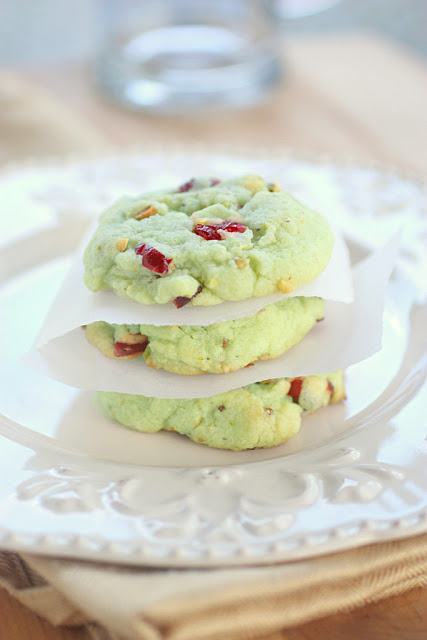
Cran-Pistachio Cookies

These are easy enough that you could easily whip up a 7-8 dozen for a cookie exchange. Somehow I managed to complicate an easy recipe like this.

Cran-Pistachio Cookies
 
Source: Betty Crocker
Ingredients:
1 (1 lb 1.5 ounce) pouch Betty Crocker Sugar Cookie Mix
1 box (4 serving size) pistachio instant pudding and pie filling mix
1/4 cup flour
1/2 cup butter, melted
2 eggs
1 cup dry roasted salted pistachio nuts, chopped
1/2 cup dried cranberries, chopped
optional – green food coloring (I didn’t add any but if you wanted them extra green you could)
Instructions:
Preheat oven to 350 degrees.
In a large bowl stir cookie mix, pudding, and flour. Add melted butter and eggs and stir until incorporated.
Add pistachios and cranberries and mix well.
Drop by rounded spoonfuls onto a parchment lined cookie sheet.
Bake for 8-10 minutes. The only way you can ruin these cookies is to overbake them! If you bake them too long you will lose the soft texture and they won’t be as green. They will not look done but take them out and let them sit on the pan for about 2 minutes. Trust me.
Cool on a wire rack. Store in an airtight container. Makes about 2 dozen cookies.

Tuesday, December 4, 2012

Red Velvet White Chocolate Chip Cookies

Red Velvet White Chocolate Chip Cookies
Yields about 3 dozen

Ingredients:
2 1/4 cups all-purpose flour

2 1/2 Tbsp cocoa powder*
1 1/2 tsp cornstarch
3/4 tsp baking soda
1/2 tsp salt
7 Tbsp butter, at room temperature
6 Tbsp all vegetable shortening, at room temperature
1 1/2 cups granulated sugar
1 large egg
1 large egg yolk
1 1/2 tsp white vinegar
1 1/2 tsp vanilla extract
1 Tbsp red food coloring
1 1/3 cups white chocolate chips, divided

Directions:
Preheat oven to 375 degrees. In a mixing bowl, whisk together flour, cocoa powder, cornstarch, baking soda and salt, set aside. Add butter, shortening and sugar to the bowl of an electric stand mixer and mix on medium speed until very pale and fluffy about 4 minutes. Add egg and egg yolk and mix until combine. Add vinegar, vanilla and food coloring and mix until well blended. Slowly add in dry ingredients and mix just until combine. Mix in 1/2 cup white chocolate chips. Scoop dough out by the heaping tablespoonfuls (about 1 1/2 Tbsp) and roll into balls and place on buttered or Silpat lined cookie sheets. Gently press about 6 white chocolate chips into the top of each cookie, being careful not to flatten the cookies (if you do flatten them a bit just reshape them to the height they had before adding the chips) and bake in preheated oven 8 - 9 minutes. Allow to cool several minutes on baking sheet before transferring to a wire rack to cool. Store cookies in an airtight container.

*If you want a more chocolaty cookie you could replace 1 - 2 Tbsp flour with an additional 1 -2 Tbsp cocoa, the red just won't be quite as vibrant. Or, you could replace the white chocolate chips with chocolate chips.

Crunchy Peanut Butter Cups


Crunchy Peanut Butter CupsMakes 8
Print Recipe
1/4 cup butter
3/4 cup peanut butter
3/4 cup graham cracker crumbs
1/4 cup sugar
1 cup semisweet or milk chocolate chips
1/4 cup milk
Sea salt
Line a  muffin tin with papers (you could also use a mini muffin tin if you prefer).
In a microwave safe bowl, melt the butter & peanut butter together for 45 seconds.  Stir until smooth.  Add graham cracker crumbs and sugar and mix to combine.  Distribute mixture evenly between the prepared muffin cups.  Refrigerate for 15 minutes to set peanut butter layer.
After the peanut butter has chilled, combine chocolate and milk in a microwave safe bowl and heat in 25 second intervals until chocolate is just melted.  Stir until smooth.  Distribute chocolate evenly over the top of the peanut butter layer.  Sprinkle with sea salt and chill until firm, at least 30 minutes.  Store covered in the fridge.

Beets with Goat Cheese


Beets with Goat Cheese

Ingredients

  • 3 pound medium beets
  • 3 tablespoons raspberry vinegar
  • 2 tablespoons extra-virgin olive oil
  • 1/4 teaspoon salt
  • 1/4 teaspoon ground black pepper
  • 3/4 cup toasted pecans, chopped
  • 2 ounces goat cheese, crumbled
  • 2 tablespoons chopped fresh parsley

Make It

1. Place the beets in a large pot and cover generously with cold water. Place over high heat and bring to boiling. Reduce heat and simmer, uncovered, for 1 hour or until tender, adding water to pot, if necessary, to keep beets submerged. Drain and cool until easy to handle.
2. Peel skins from beets and trim ends. Cut into wedges and place wedges in a large bowl. Add vinegar, oil, salt, and pepper and toss to coat. Transfer to a serving bowl. Top with pecans, cheese, and parsley.

Monday, November 19, 2012

Amazing Dinner Rolls for Thaksigivng


Thank you to OurBestBites for this amazing dinner roll recipe. 

Ready? Awesome. You’ll need whole milk, all-purpose flour, yeast, sugar, salt, butter, and eggs. Nothing fancy.

Combine milk, 1/2 c. sugar, butter, and salt in a medium saucepan. Heat over medium heat until butter melts. It’s salty. It’s sweet. Yum.
Remove from heat. Allow to cool to lukewarm. I usually rub some ice cubes along the sides of the pan or pop the entire pan in a sink full of ice cubes to cool the mixture down because this step can take forever. This step is really important because if the mixture is too hot, it will kill the yeast.

While the milk mixture is cooling, dissolve the yeast and 1 Tbsp. sugar in warm water. Let stand about 10 minutes. If the yeast hasn’t bubbled, you’ll need to repeat this step–moving on with yeast that hasn’t been activated properly will only end in heartache for you and hate mail for us.
In a large mixing bowl, combine 3 c. flour and milk mixture. Beat on low for 30 seconds, scraping sides of bowl constantly. Add yeast mixture and beat on high for 3 minutes.
Add beaten eggs. Why should you beat your eggs first? Same reason you should combine your dry ingredients before adding them to moist ingredients when making cookies and cakes–it ensures everything is well-mixed and can be evenly-distributed through your dough or batter. If you add the whole eggs, your dough may not be as consistent.
Stir in as much remaining flour as needed to make a soft dough. This dough should be very soft–it will be coming away from the sides of the bowl, but it will still stick to your finger when you touch it. Don’t worry, it will firm up during the rising process. Part of what makes these rolls so good is that they’re so soft and light; if you add too much flour, they will be heavy and dense. Place the bowl in a warm place and cover with a clean towel; allow to rise 1 hour.

See that ghostly reflection in the bowl?? Oh, wait, that’s me…
Punch down dough. Lightly flour your work surface and turn dough out onto surface. Divide in half.
Spray 2 9×13 glass pans with cooking spray. Roll first portion of dough into a rectangle and then cut it into 12 equal-sized pieces. I like to use a pizza cutter because it has a blade on each side, so it cuts right through dough without sticking to the blade. This dough should be very easy to work with, almost like playdough. Shape each piece into a ball and place in prepared pan. Repeat with remaining dough in the second pan.
Cover with a clean cloth and allow to rise in a warm place for about 30 minutes. When dough has about 15-20 minutes to go (depending on your oven), preheat oven to 375.
Bake for 15-18 minutes or until golden-brown.
When done, remove from oven. Rub a stick of cold butter over the tops of the rolls. You must now eat one. Now. While it’s hot.
Then pop the rest into a bowl and no one will ever know that you cheated.

Homemade Twinkies

Since we no longer can buy these anymore, let's make some that are homemade.  :0 )
 
Time: 1 hour 40 minutes
 
FOR THE CAKES:
Nonstick cooking spray or vegetable oil
60 grams ( 1/2 cup) cake flour
30 grams ( 1/4 cup) all-purpose flour
1 teaspoon baking powder
1/4 teaspoon salt
2 tablespoons milk
4 tablespoons unsalted butter
1/2 teaspoon vanilla extract
5 large eggs at room temperature, separated
12 tablespoons sugar
1/4 teaspoon cream of tartar
 
FOR THE FILLING:
6 tablespoons unsalted butter, at room temperature
165 grams (1 1/2 cups) confectioners’ sugar
3/4 cup Marshmallow Fluff
2 tablespoons heavy cream.
 
1. For the cakes: Heat the oven to 350 degrees and adjust the oven rack to the lower-middle position.
2. To make single-use Twinkie molds, cut 12 pieces of aluminum foil 12 inches wide by 14 inches long. Fold each piece of foil in half lengthwise, then fold it in half again to create a rectangle that’s about 6 inches long and 7 inches wide. Repeat to make a dozen rectangles.
3. Place one sheet of folded foil on a work surface with a standard-size spice jar on its side in the center of the foil. Bring the long sides of the foil up around the jar, folding the sides and ends as necessary to make a tight trough-shape from which the jar can be removed. Repeat to make 12 foil molds. Spray generously with nonstick spray or coat with vegetable oil. Place the molds on a baking sheet.
4. In a mixing bowl, whisk together the cake flour, all-purpose flour, baking powder and salt. In a small saucepan over low heat, heat the milk and butter until the butter melts. Remove from the heat and add the vanilla. Cover to keep warm.
5. Using a standing mixer, beat the egg whites on high speed until foamy. Gradually add 6 tablespoons of the sugar and the cream of tartar and continue to beat until the whites reach soft peaks.
6. Transfer the beaten egg whites to a large bowl and add the egg yolks to the standing mixer bowl (there’s no need to clean the bowl). Beat the egg yolks with the remaining 6 tablespoons sugar on medium-high speed until the mixture is very thick and a pale lemon color, about 5 minutes. Add the beaten egg whites to the yolks, but do not mix.
7. Sprinkle the flour mixture over the egg whites and then mix everything on low speed for just 10 seconds. Remove the bowl from the mixer, make a well in one side of the batter, and pour the melted butter mixture into the bowl. Fold gently with a large rubber spatula until the batter shows no trace of flour and the whites and yolks are evenly mixed, about 8 strokes.
8. Immediately scrape the batter into the prepared molds, filling each with about
3/4 inch of batter. Bake until the cake tops are light brown and feel firm and spring back when touched, 13 to 15 minutes. Transfer the pan containing the molds to a wire rack and allow the cakes to cool in the molds.
9. For the filling: Using a mixer, beat together the butter, confectioners’ sugar and Marshmallow Fluff. Add the cream and beat just until smooth.
10. Just before filling the cakes, remove them from the foil. Using the end of a chopstick, poke three holes in the bottom of each cake. Wiggle the tip of the chopstick to make room for the filling. Transfer the frosting to a pastry bag fitted with a 1/4-inch round tip. Pipe frosting into the holes in each cake, taking care not to overfill, until it gently expands. Unlike real Twinkies, these won’t last indefinitely. They’re best served still slightly warm.
 
Yield: 12 homemade Twinkies.

Thursday, November 15, 2012

Butternut Squash & Kale Soup

Autumn = squash season. I love eating butternut squash soup for lunch or dinner. Incredibly satisfying, comforting, hearty, and healthy. All the right ingredients that are guaranteed to make you feel good.

Ingredients:
* 1 large butternut squash
* 3 small onions or 1.5 large onions (yellow or white)
* 1 lb. kale
* 1-2 tablespoons of olive oil
* 1 twig of ginger
* 4 cups of chicken stock (homemade or store bought)
* Salt and pepper to taste

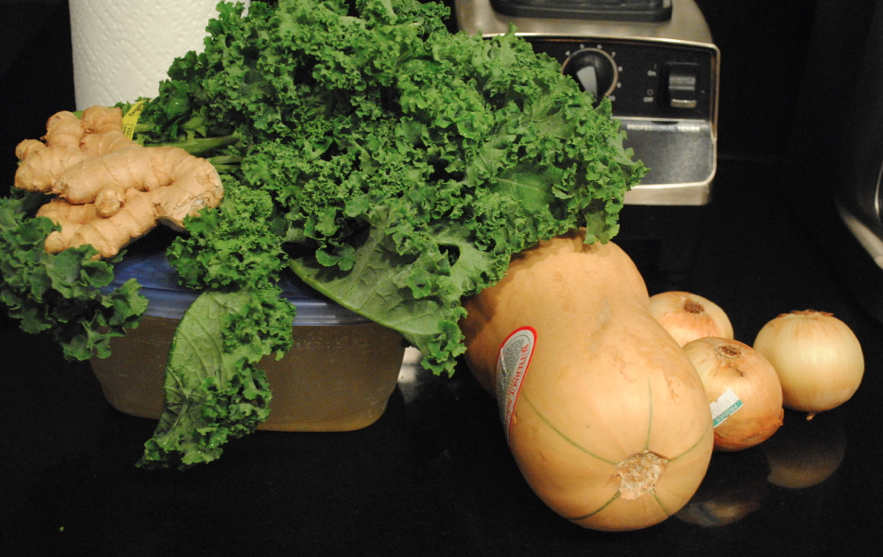
ingredients
Simple ingredients that make a hearty and tasty soup.


Directions:
* Basically, you peel, chop, boil, blend, and voila!
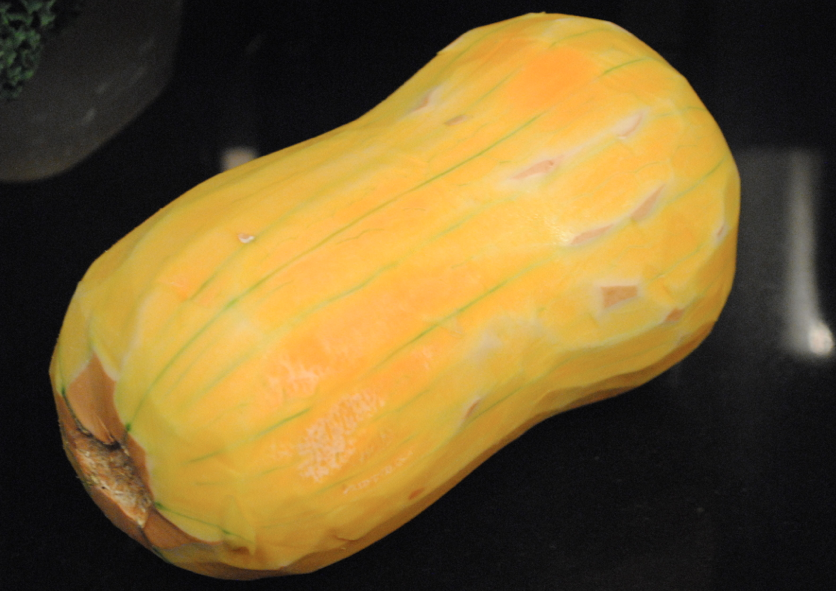
peel
Peel the squash (with peeler).
chop onions
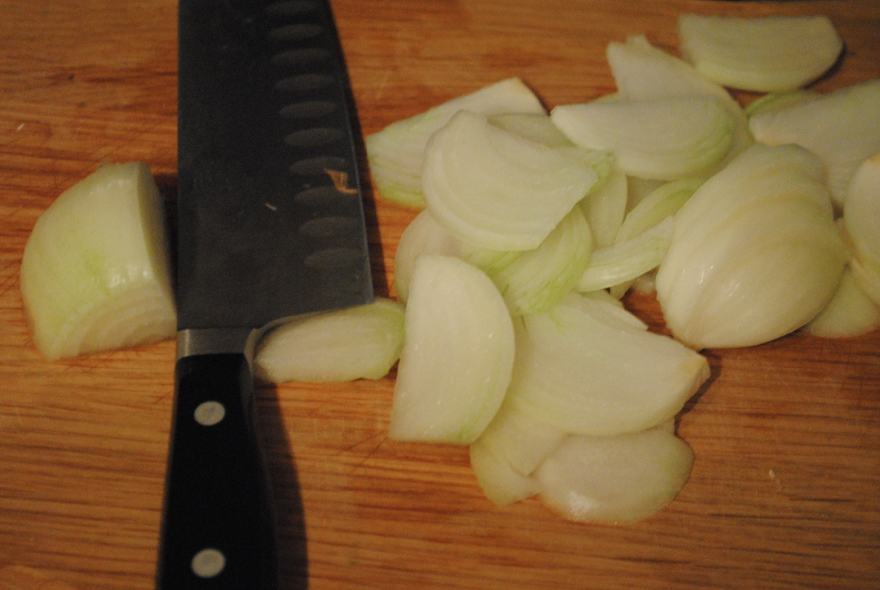
Chop the onions. You don't have to worry about the size of the pieces because you blend everything together.
sautee
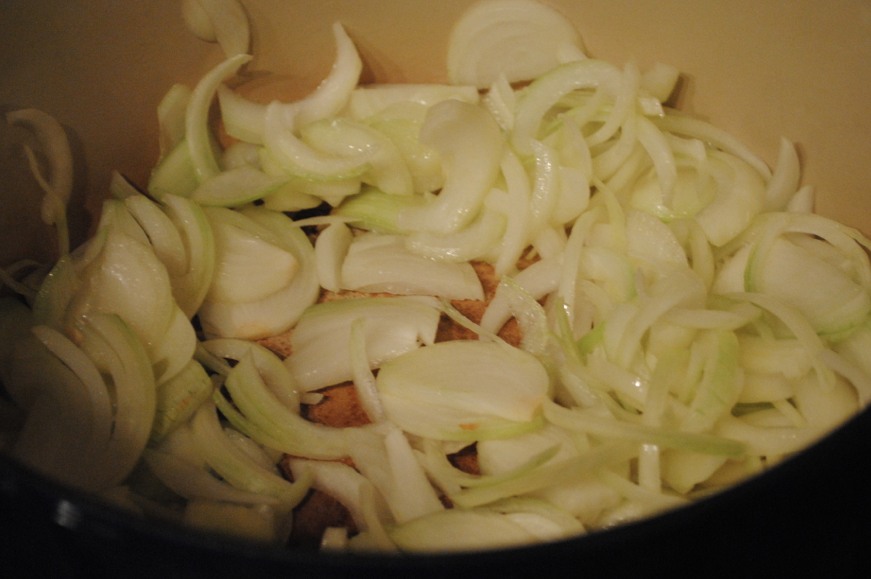
Pour olive oil into the pot, and sautee the onions until clear. Add a couple pinches of salt.
ginger
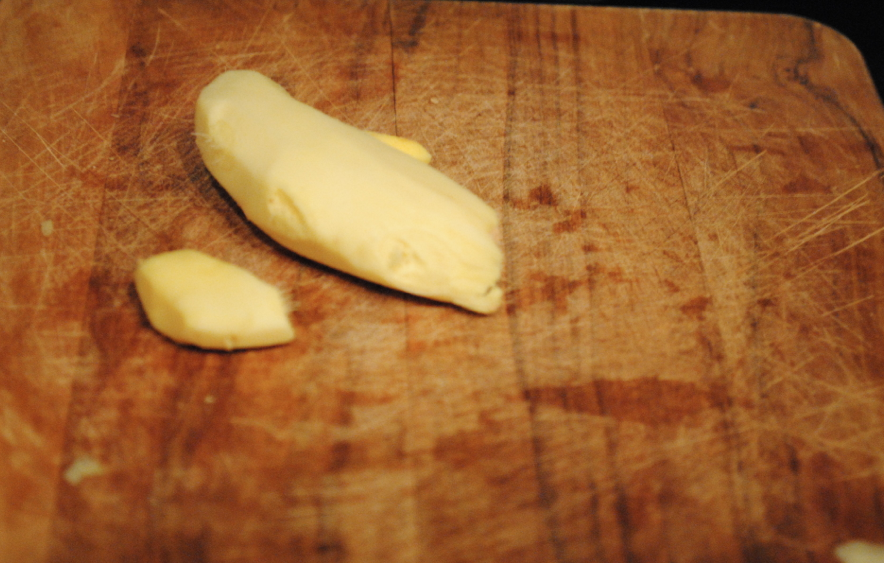
Peel the ginger and chop into smaller pieces.
ginger and onion
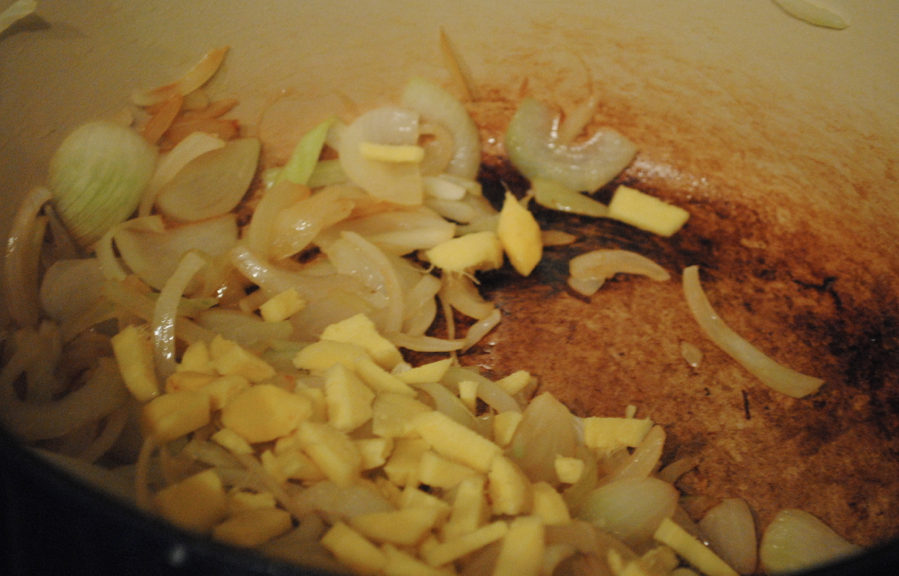
Put the ginger in with the onion and mix around.
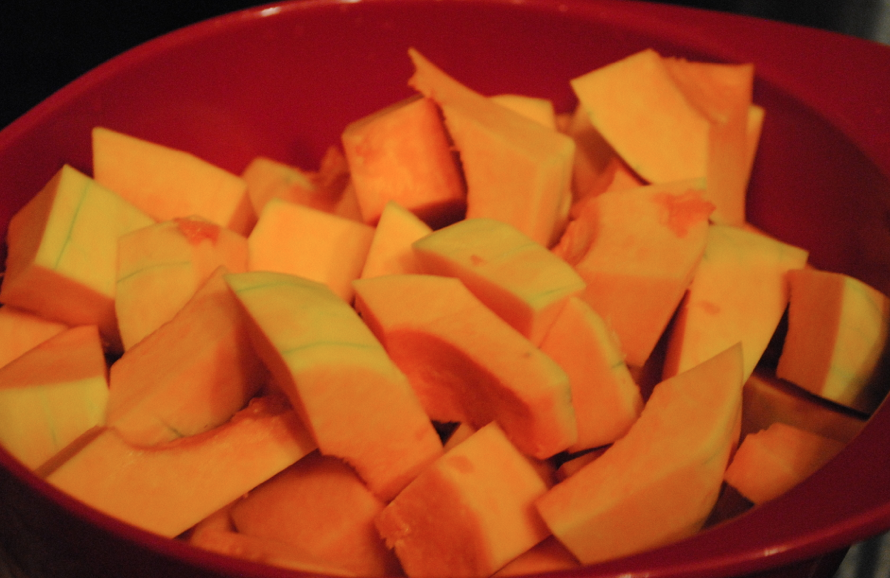
cut squash
Cut the squash into big chunks. Love the bright orange color. Kind of like the signature Hermes orange.
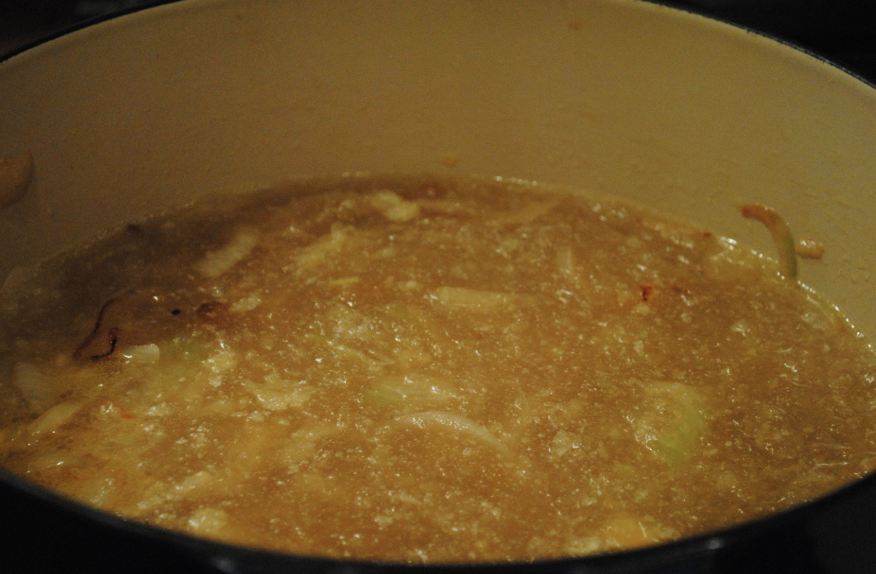
chicken broth
Pour chicken broth into the pot with the ginger and onions. We like to have homemade chicken stock frozen at all times. We tend to do this on weekends when making a dish with shredded chicken. Last week, we made kale chicken zucchini enchiladas. TO DIE FOR. And this chicken stock was from that chicken.
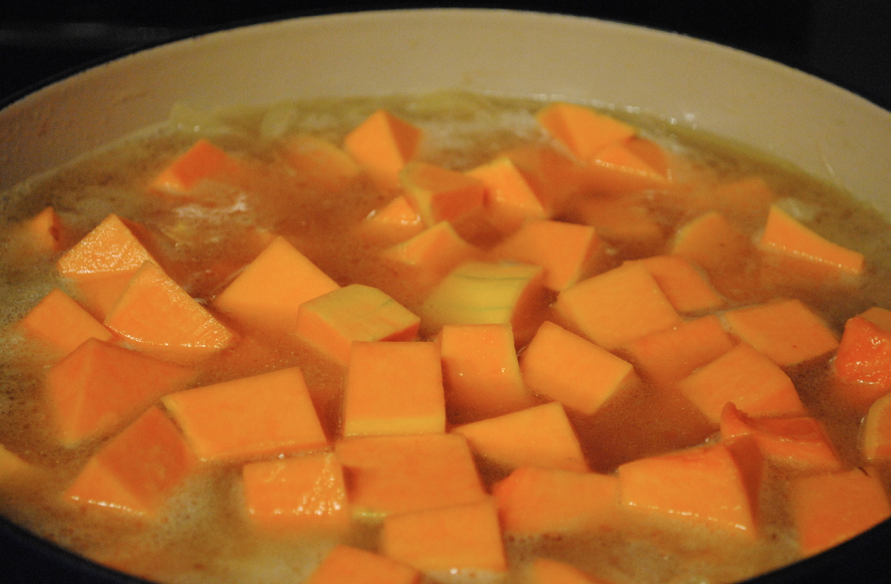
squashinbroth
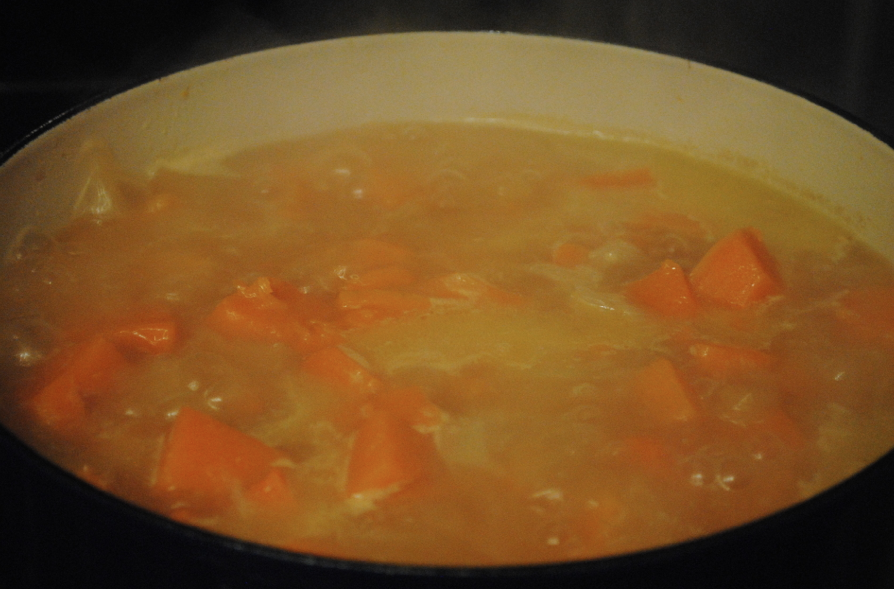
Add the squash into the broth and let it sit all together until it boils.
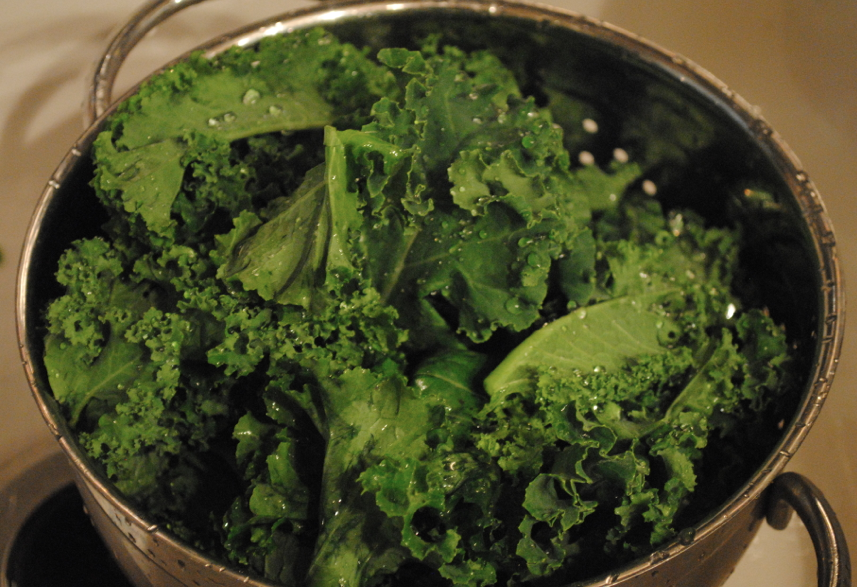
kale
Wash the kale and remove the leaves from the stems (discard the stems).
boiling
Boiling pot of gold.
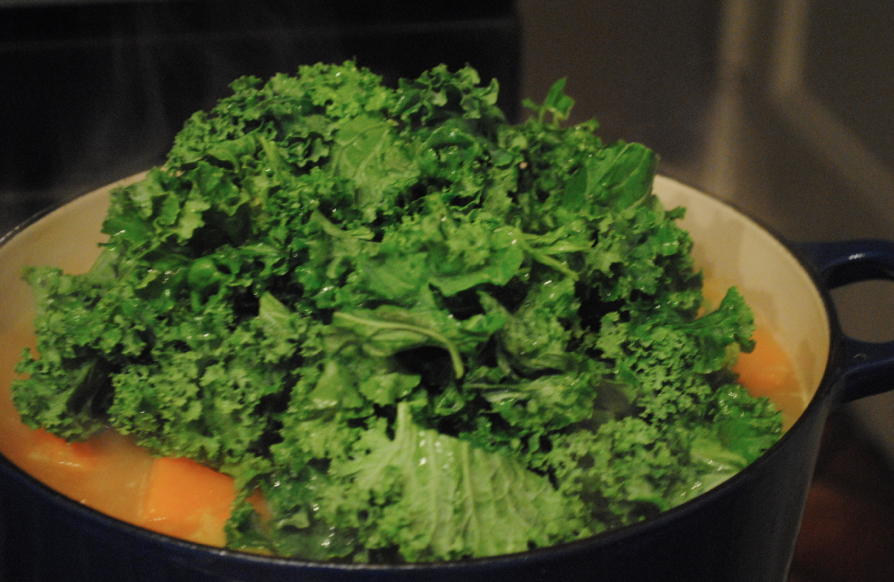
add kale
Add the large pile of kale to the soup. It looks like a lot -- it is a lot -- but it so so good for you that the more the better!
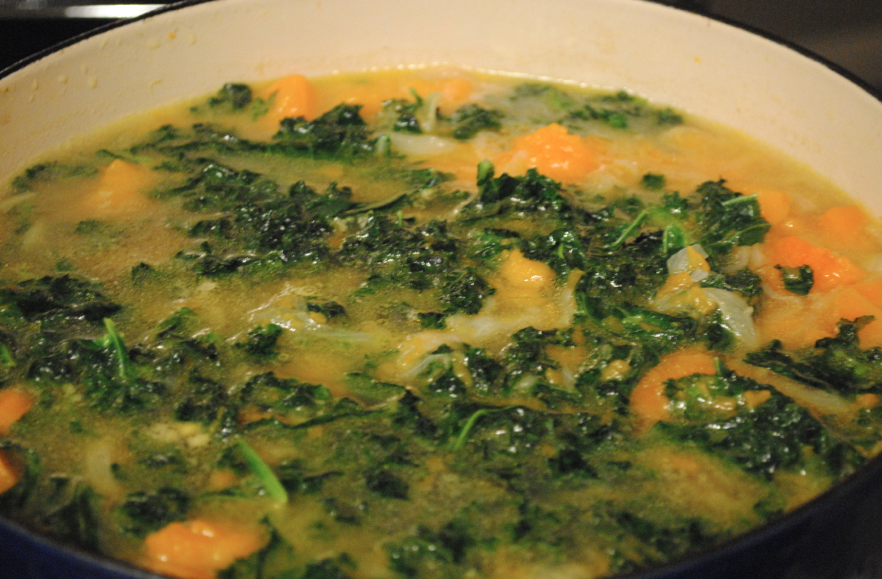
yummmmm
Yummmmm
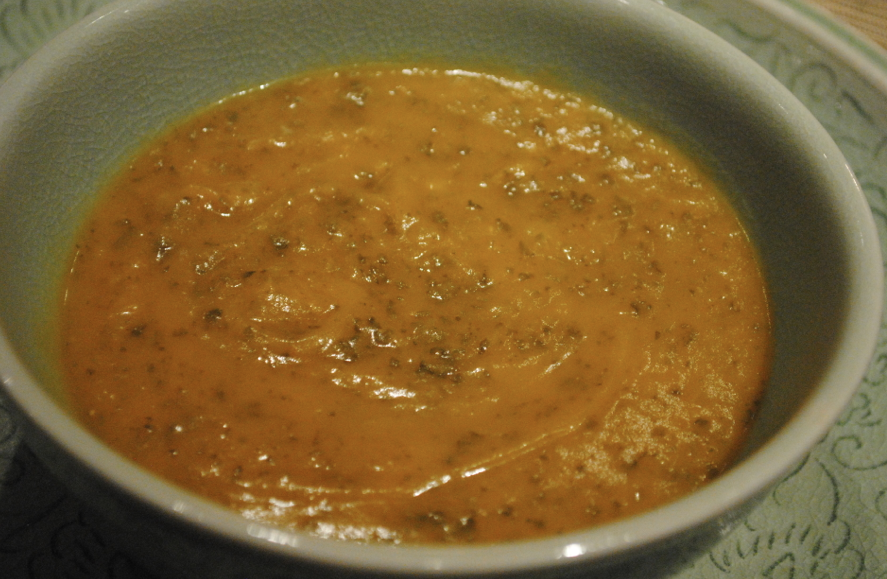
And then, put the mixture into a blender (vitamix), blend until it is all pureed together, and SERVE!
finished ORANGE GREEN GOODNESS!
This soup is great as is, or with some crumbled goat cheese. Serve as a main with salad (and a hunk of bread and cheese), or as a starter to a meal. Anyway, you can’t go wrong! Have a great weekend!