Thursday, February 21, 2013

Baba Ganoush

I recently introduced BabaGanoush to my husband when we went to a Mediterranean restaurant and now the man is HOOKED.  Baba Ganoush is made up mostly of fire-charred eggplants.  Did you know that another word for eggplant is aubergine.  We didn't either - we learned that today.  But here's one of our more favorite recipes.  Can't wait to try it at home.

Thanks Your Middle East

Baba Ganoush


Ingredients:
4 aubergines
6 garlic cloves
2 cups raw tahini - we found a great raw tahini recipe online for you guys to use which is simple
1/3 cup lemon juice
Salt, to taste
Olive oil
 A bunch of parsley or coriander leaves, thinly chopped.

1. Wash and char the aubergines one by one, on the stove’s open, high flames, till thoroughly tender on all sides. Some recipes call for frying or baking the aubergine in the oven, but this is heresy. Broiling the aubergine on an open fire gives it the special, smoky taste that makes the greatness of the Baba Ganoush. If you fear the mess to your stove, line it with aluminium foil. Otherwise, be ready to settle for compromise. And if you really want to get the most of the smokiness, char the aubergines for at least 10 to 15 minutes, and then set aside to cool.

2. After the aubergines have cooled, half them and scoop out the aubergine flesh (preferably with a wooden or a plastic utensil, as metal would blacken the aubergine flesh and alter its flavour). If some of the aubergines’ black skin sticks to the flesh don’t fret – it’s only for the best and your palate will thank you for it, but don’t get carried away and leave too much of it, or your whole dish will taste of burnt aubergine skin. Mash it and let it sit in a colander for a while, to drain the fluids.

3. Mix together in a serving bowl the aubergine flesh with the crashed garlic cloves, the raw Tahini, the lemon juice and the salt. Stir together, taste, and adjust seasoning.

4. Before serving, top with olive oil and the minced herbs.
Since the recipe varies from one region to another, feel free to do the same and experiment, replacing some of the Tahini with yogurt, adding spring onion, or toasted cumin seeds. Another tradition is to add pomegranate seeds or pomegranate molasses on top of the dish, for an added sweet-sour tang.



Tuesday, February 12, 2013

Spinach & Artichoke Chicken

Spinach Artichoke Chicken Recipe from addapinch.com
Oh my goodness gracious is it amazing! Think your favorite spinach artichoke dip all over the top of baked chicken.

There’s something so comforting about this spinach artichoke chicken that it has really become one of our favorite ways to eat chicken now. While the ingredients list doesn’t specify, I like to use lower fat ingredients for the topping such as part-skim mozzarella cheese, fat-free Greek yogurt, and a light mayonnaise. Of course, use what you prefer!

And luckily, it is one of the easiest things to make that you can think of!
Spinach Artichoke Chicken Recipe from addapinch.com

You just throw your chicken into a baking dish, then mix up your spinach artichoke topping and pour it on top. Bake it and then watch it disappear.

The chicken turns out so flavorful and tender. My mouth is watering just thinking about it.
It’s great to get kids to eat their vegetables, too.
 
Spinach Artichoke Chicken makes for a simple, delicious meal that everyone will love.
 Serves: 8
 
Ingredients
  • olive oil spray
  • 8 chicken breasts
  • 13.75 oz artichoke hearts packed in water, drained
  • 10 oz frozen spinach, thawed and squeezed
  • 2 shallots, chopped
  • 1 clove garlic, minced
  • ½ cup Greek yogurt
  • ½ cup mayonnaise
  • ½ cup Parmesan cheese
  • ½ cup shredded mozzarella cheese

Instructions
  1. Preheat oven to 375ยบ F. Spray baking dish with olive oil nonstick baking spray.
  2. Place chicken into baking dish. Salt and pepper chicken and then bake 15 minutes.
  3. Meanwhile, in a medium bowl, combine remaining ingredients and then pour on top of chicken. Bake 20-25 minutes.
  4. Let stand about 5 minutes before serving.

Saturday, February 2, 2013

Football Strawberries

super bowl snack

Super Bowl Snack: Football Chocolate Covered Strawberries

It's time for the Superbowl, here's a fun way of serving a snack for your get-together...Take a look at these adorable Football Chocolate Covered strawberries! It is super easy and the perfect addition to your party!
What you will need:
  • Strawberries
  • Chocolate (baking chocolate or chocolate chips work great)
  • White Icing
Directions:
  • Melt the Chocolate
  • Dip the Strawberries in the chocolate
  • Draw a football onto the strawberries!
  • Enjoy!

Thursday, January 31, 2013

Cinnamon Bread

CINNAMON BREAD
(makes 2 loaves)
Batter:
1 cup butter, softened
2 cups sugar
2 eggs
2 cups buttermilk or 2 cups milk plus 2 tablespoons vinegar or lemon juice
4 cups flour
2 teaspoons baking soda
Cinnamon/sugar mixture:
2/3 cups sugar
2 teaspoons cinnamon 
Cream together butter, 2 cups of sugar, and eggs.  Add milk, flour, and baking soda.  Put 1/2 of batter (or a little less) into greased loaf pans (1/4 in each pan).  Mix in separate bowl the 2/3 c sugar and cinnamon.  Sprinkle 3/4 of cinnamon mixture on top of the 1/2 batter in each pan.  Add remaining batter to pans; sprinkle with last of cinnamon topping.  Swirl with a knife.  Bake at 350 degrees for 45-50 min.  or until toothpick tester come clean.  
Cool in pan for 20 minutes before removing from pan.
I have also made this bread in muffin tins which made it a little easier to freeze and take out as needed.

Cheesy Pull-Apart Bread

Superbowl is coming on Sunday, and it's the best excuse to eat "bad for us food", drink lots of beer and sit with good company.  Here's a recipe we're going to be making this Sunday.

Cheesy Pull-Apart Bread
If the prospect of filling your belly with nothing more than carbs and cheese excites you as much as it excites me, then you need to run, not walk, into the kitchen and make this bread. I am the certified queen of the carbs and cheese combo. Give me a loaf of bread and a hunk of cheese and I’m all set. Imagine cheesy garlic bread on steroids… that you can pull apart with your fingers. Yes, it’s every bit as amazing as you’re imagining it to be.

Cheesy Pull-Apart Bread
The best part about this little gem? It’s seriously the easiest thing to prepare.
Take one loaf of bread… cut it up into a grid pattern… pour a mixture of melted butter, garlic and scallions into all of the crevices, cover with foil and bake.
Take it out of the oven… stuff and cover it in shredded cheeses and pop it back into the oven, uncovered.
Pull-Apart Cheesy Bread
Voila! Crusty, cheesy awesomeness, right on your kitchen counter.
Cheesy Pull-Apart Bread
You don’t need me to tell you that you won’t be able to stop eating this. I dare you to try. Three of us demolished this entire loaf and, truth be told, it would have been very easy for only two of us to do it. In situations like this, it’s a good thing that I was taught to share at an early age.
I’m looking forward to consuming many, many more loaves of this cheesy bread. You owe it to yourself and those you feed to make at least one!
Cheesy Pull-Apart Bread

Cheesy Pull-Apart Bread

Yield: 4 to 8 servings
Prep Time: 10 minutes
Cook Time: 25 minutes
Total Time: 40 minutes
This cheesy pull-apart bread has been made in countless forms; this cheesy garlic version is my favorite.

Ingredients:

1 large loaf or boule-style Italian bread (Sourdough or French could also work)
½ cup butter (unsalted or salted is fine), melted
1 clove garlic, minced
1 bunch scallions, trimmed and thinly sliced
8 ounces sharp Cheddar cheese, shredded (about 2 cups)
8 ounces Monterey Jack cheese, shredded (about 2 cups)

Directions:

1. Preheat oven to 350 degrees F. Spray a sheet of heavy-duty foil with non-stick cooking spray and set aside.
2. Cut a cross-hatch pattern into the top of the bread by slicing ½-inch grid lines into the bread, stopping about ¼-inch from the bottom of the bread so that it stays together. Place the bread on the piece of foil that has been sprayed.
3. Stir together the melted butter, garlic and scallions.
4. Gently separate the bread with your fingers, then spoon the butter mixture in all of the seams, making sure it is evenly distributed among the whole loaf. Wrap the loaf up in the foil and place on a baking stone or directly on the oven rack and bake for 10 minutes.
5. Remove from the oven and increase the oven temperature to 425 degrees F.
6. Open the foil and sprinkle the shredded cheese on top of the bread. There will be a lot of cheese, so try to push down as much as you can in between all of the crevices in the bread. Leave the foil open and return it to the oven. Bake until the cheese is completely melted, bubbling and starting to brown on top, about 15 minutes. Let stand for 5 minutes before serving, then dig in!

Wednesday, January 30, 2013

Nian Goa for Chinese New Year

Nian Gao is considered good luck during Chinese New Year, and therefore something every family usually buys to eat.  This year - we're going to make our own.  Here is a simple recipe you can use.


Nian Gao, or Chinese New Year's Cake

Ingredients
  • 1-1/2 cups water
  • 2-1/2 cups dark brown sugar, packed
  • 1/2 cup vegetable oil
  • 4-1/2 cups sweet rice flour (Available in Asian specialty markets)
  • 3 dried red dates (Available in Asian specialty markets
Instructions
  1. In a large saucepan, boil the water, add the sugar and the oil, and stir just until the sugar is dissolved. Set aside to cool for about 20 minutes.
  2. Mix the rice flour thoroughly with the cooled liquid and transfer the mixture into an 8-inch round aluminum pan. (The aluminum pans at supermarket salad bars work very well for this). Set the dates in the middle.
  3. Put an inch of water into a wok, a large pot, or a large flat pan and carefully set the pan of batter in the water. Cover lightly with aluminum foil and gently steam the mixture for about 50 minutes. Take care not to let the water boil over into the nian gao.

    Steaming can also be done in the oven: set a large pan of hot water on the middle shelf of a 375-degree oven and carefully place the nin gao, covered loosely with foil, in the hot-water bath. The water should be gently bubbling. Steam for about 50 minutes or until the mixture is firm in the middle. Cool thoroughly before cutting the nian gao into diamond shapes. Makes 12 servings.

Baked Apple Chips with Cinnamon Sugar

We saw this recipe from Foodlets.com and knew we had to borrow it for our blog.  I know my kiddies always ask me to buy chips whenever we're at the grocery store (that's why I avoid bringing them whenever I can).  While I sometimes give in - most of the time, I rather them not put a bunch of processed crap in their system.

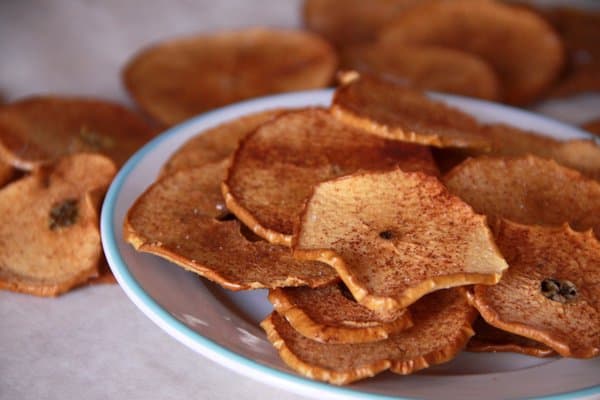
These apple chips are easy to make, will make your house smell delicious and actually good for them.


 BAKED APPLE CHIPS WITH CINNAMON SUGAR


Ingredients
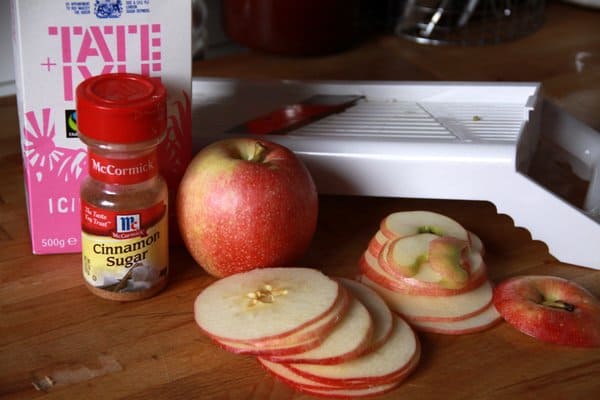
  • 2 apples (golden delicious, gala or other fall baking apples are best)
  • 2 teaspoons powdered sugar
  • 2 teaspoons cinnamon sugar
Instructions
Preheat oven to 200 degrees.
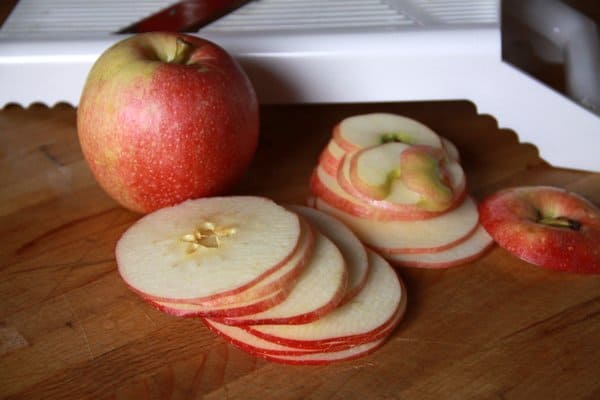
Wash and slice apples horizontally, using a mandolin if possible. Don’t bother coring, just remove any pieces of seeds.
On a baking sheet lined with a non-stick sheet such as Silpat, or parchment paper, sprinkle powdered sugar in a very thin, even layer. Line up apple slices, side by side as closely as they’ll fit in. Sprinkle cinnamon sugar on top. Place in the warm oven for at least 90 minutes, rotating once halfway through. For sweeter and chewier apples, remove at this point. For crispier apples with a more toasted flavor, cook for the full 2 hours.
Note: the “chips” may not be crispy to the touch when you first remove them from the oven. Remove them from the baking sheet and allow to cool on a wire rack or counter space. They’ll crisp up a bit here. Also, the thicker you slice the apples, the chewier the result.