Monday, January 28, 2013

Super Bowl: Root Beer Pulled Pork Recipe

Your next Super Bowl party will certainly be a big hit with Root Beer Pulled Pork! It takes about twenty minutes to prep and within 8 to 10 hours the pulled pork turns out amazing!
Ingredients
  • 1 medium onion, chopped
  • 1 garlic clove, minced
  • ½ cup ketchup
  • 1/3 cup cider vinegar
  • 1 (4 ounces) tomato paste
  • 1 tablespoon paprika
  • 2 tablespoons Worcestershire sauce
  • 2 tablespoons yellow mustard
  • 1 (12 ounce) can or bottled root beer (do not use diet root beer)
  • 4 lbs boneless pork shoulder roast
  • 12 buns
Instructions
In a slow cooker, mix everything together except the pork.
Add the pork, stir well, and cover.
Cook on low for 8-10 hours.
An hour or two before it is done shred the pork with two forks in the slow cooker.
Mix well. The sauce will be a little runny but the longer you let the meat sit the more it will soak up the juices.
Serve on hamburger buns.


Sunday, January 27, 2013

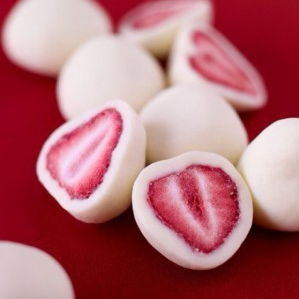
Frozen Strawberries & Yogurt

Valentines Day Ideas

Valentines Day Ideas: Frozen Strawberries & Yogurt

I saw this adorable snack and thought it was perfect for this time of year with Valentine’s Day right around the corner. It is super easy to make and is a very healthy snack – especially with all of the yogurt deals we get great deals on! These are the perfect after school snack!
What you will need:
  • Strawberries
  • Yogurt (Greek/flavored anything you would like)
  • Freezer
Directions:
  • Optional: Cut the strawberries in half
  • Dip the Strawberries in yogurt
  • Put them in the freezer
  • Enjoy!

Friday, January 25, 2013

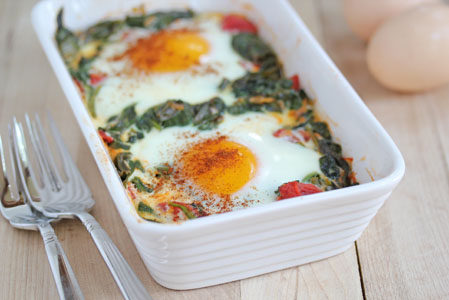
Spinanch & Egg Bake

baked egg with spinach 7 Baked Eggs with Spinach, Tomatoes and Garlic   Grow. Eat. $ave.
An egg baked on a bed of spinach, tomatoes and garlic. Sounds so fancy and gourmet!!!

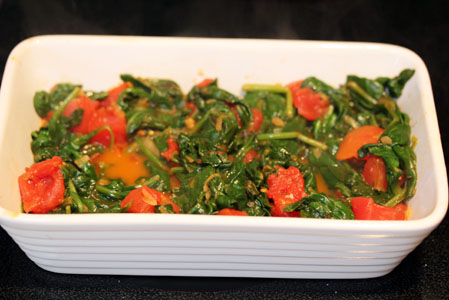
First up is spinach.
baked egg with spinach 1 Baked Eggs with Spinach, Tomatoes and Garlic   Grow. Eat. $ave.
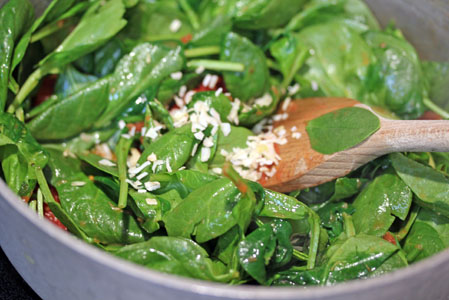
First saute it with some garlic.
baked egg with spinach 2 Baked Eggs with Spinach, Tomatoes and Garlic   Grow. Eat. $ave.
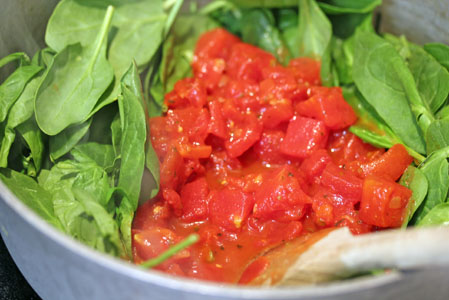
Add some diced (or fresh) tomatoes.
baked egg with spinach 3 Baked Eggs with Spinach, Tomatoes and Garlic   Grow. Eat. $ave.
And some minced onion.  Cook it down.
baked egg with spinach 4 Baked Eggs with Spinach, Tomatoes and Garlic   Grow. Eat. $ave.
Place into a small baking dish…or you can do 1 egg each in ramekins.
baked egg with spinach 5 Baked Eggs with Spinach, Tomatoes and Garlic   Grow. Eat. $ave.
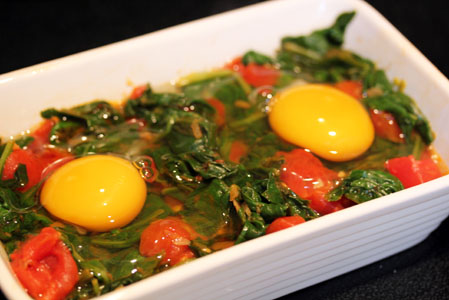
Create wells for the eggs, then crack 1 at a time into each well.
(This dish was the perfect size for 2 eggs.)
baked egg with spinach 6 Baked Eggs with Spinach, Tomatoes and Garlic   Grow. Eat. $ave.
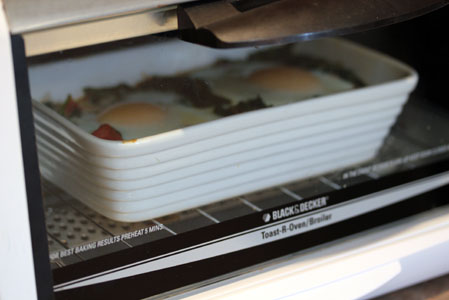
Bake.

baked egg with spinach 8 Baked Eggs with Spinach, Tomatoes and Garlic   Grow. Eat. $ave.
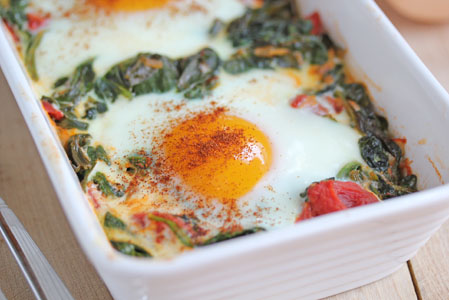
Give a little sweet flare with some paprika.
And enjoy a fancifully gourmet breakfast!!!

Baked Eggs with Spinach, Tomatoes and Garlic

Yield – 4 servings
Preparation Time – 15 minutes
Cooking Time – 10 minutes

Ingredients

  • 2 Tbsp olive oil
  • 2 garlic cloves, crushed
  • 10 oz. fresh spinach
  • 1 15 oz. can diced tomatoes, drained
  • 2 Tbsp minced onion
  • 4 eggs
  • Salt and pepper
  • Paprika, sprinkle as garnish
  • Fresh fruit as side dish

Directions

  • Preheat oven to 350.
  • To a large skillet or saucepan, add the olive oil and saute the garlic for a minute, before adding the spinach.  Toss the spinach around for a minute, then add the diced tomatoes.  Toss together and then add the minced onion.  Let simmer until most of the liquid has cooked off, about 5-7 minutes.
  • Place the sauteed spinach into an ovenproof, creating divets for the eggs.  Crack 1 egg into each hole.
  • Bake the spinach and eggs for about 8 to 10 minutes, or until egg whites have turned white.
  • Once cooked, remove from the oven and sprinkle with salt and pepper and paprika.
  • Serve with fresh fruit for a well balanced breakfast!

Wednesday, January 23, 2013

Indian Chicken Curry

The slow cooker is one of the most popular method of cooking during the winter season.  When most people think of Indian cooking, the first dish that comes to mind is a good chicken curry. 

This recipe makes for 6 servings.

Ingredients  
  • 3 pounds of skinless whole chicken cut in about 8 pieces - boneless is fine to use. 
  • 1 large yellow or red onions cut into 8 pieces
  • 2 medium tomatoes quartered
  • 1 4inch piece gingerroot, cut into 1-inch pieces
  • 10 cloves garlic
  • 1 tablespoon salt
  • 1 tablespoon turmeric
  • 1 tablespoon garam masala
  • 1/4 cup vegetable or canola oil
  • 1 cup plain yogurt
  • 1 tablespoon red chili powder
  • 1 cup dried methi leaves (dried fenugreek leaves)
  • 1 cinnamon stick
  • 4 green cardamom pods
  • 4 cloves
  • 4-6 green Thai or Serrano Chiles or cayenee Peppers, stems removed, halved lengthwise
  • 1/2 cup boiling water (optional)
  • Basmati or brown rice, cooked, warm
  • 1/2 cup fresh cilantro, chopped for garnish
1) Place chicken in the slow cooker
2) Process onions, tomatoes, gingerroot, and garlic till smooth.  Transfer paste to a bowl.  Whisk in the salt, turmeric, garam masala, oil, yogurt, red chili powder, and methi.  Pour over the chicken.
3) Add cinnamon stick, cardamom pods, cloves, and green chili peppers, mixing gently, cover and cook on low 8 hours.  For more brothy curry, add boiling water during the last 30 minutes of cooking, if desired.
4) Discard whole spices.  Serve over rice and garnish with cilantro.

Wednesday, January 2, 2013

Mussels with White Wine Sauce & Garlic

mussels with wine and garlic sauce

Now that the holidays are over, I know one of my New Year's Resolution is to save money and eat at home more.  My husband and I love seafood, and surprisingly this dish is really not that hard to make and doesn't cost much.  Mussels usually come in at $4 a pound, and a bottle of wine will usually go between $5- $10.  So for $20 - you can have an excellent meal at home.  

Mussels with Wine and Garlic Sauce
Prep time: 
Cook time: 
Total time: 
Serves: 3-4
 
Easy and surprisingly frugal!
Ingredients
  • 2 lb. mussels (make sure you discard any that are gaping open)
  • 2 Tbsp. extra virgin olive oil
  • 1 Tbsp. butter
  • 6 cloves garlic, minced
  • ¼ C. onion, minced (or shallots)
  • ¾ C. dry white wine
  • ⅔ C. chopped flat leaf parsley
  • 1 lb. linguine noodles
Instructions
Prepare linguine according to package directions. In a large skillet with a lid, melt the butter. Add olive oil and sauté the garlic and onions until translucent. Add the wine and mussels and about half of the parsley. Cover and heat until mussels have opened (about 8-10 minutes). Add remaining parsley as a garnish. Serve mussels and wine sauce over linguine.

Wednesday, December 12, 2012

Decorate a cake - an easy way....

(Thank you Moeys Heart & Heart for this AMAZING tutorial)
 
This is a tutorial to show you how to decorate a cake that makes you look pretty clever.
The beauty of this method is that you can put anything you darn well want on a cake. Your kid likes a certain team and you don't trust Stuffmart Bakery?

No problemo. All you need is a picture off the webz (or a coloring book page, or a drawing you did yourself) and you can make any design you want.

In this case, Gater wanted a "Dora/Princess" cake. I didn't know how I would do a "Dora/Princess", but all I had to do was spend 10 seconds on Google, ("princess dora coloring page") and there was a coloring page all ready to print out.

First, bake your cake and let it cool thoroughly. It needs a flat top, so do what you have to to make it flat.
IMG_5325cakeicedtb
Make your icing; a buttercream made with butter is best. You want an icing that is smooth and soft, but that hardens in the freezer. You will probably want to make a double batch to be sure you have enough to divide into all the colors you need.

*When you make your icing, you will want to sift the powdered sugar and mix the icing up quickly so you don't get lumps. You don't want lumps clogging up your icing tips in your detail work. Your icing should be of medium thickness, not too stiff. Soft peaks.*

Ice your cake. You want a flat-topped cake. The icing job does not have to be perfect, just flat.
IMG_5317picture
Print out a coloring page, and make sure it is the right size for the top of your cake. You need at least 1/2" space around the edge of your design on the cake.
*your design will be reversed, so if you are doing a team logo or similar, you will want a mirror image of your original printout.*

It is a good idea at this stage to decide how many colors you want to use in your finished design. You might want to mark those colors in the appropriate areas on your coloring page with markers. I didn't this time, because the design was simple and I was lazy.

Trim your coloring page, and tape it to the back side of a flat piece of glass. I always use glass from a spare picture frame.
IMG_5319waxpaper
Tape a similarly-sized piece of wax paper to the front of the glass. Now you have a coloring page/glass/wax paper sandwich.
IMG_5326icingtb
Mix up the colors you will need for your design. Don't forget to include a dark color for outlines and details.

*I prefer to use paste colors because they are vibrant and easily blendable, they don't thin out your icing, and they last pretty close to forever. One little jar of each of a few basic colors will last you for years. Sometimes you get lucky and find a marked-down pack of specialty colors, like I did. If the specialty pack has a couple good basic colors in, or ones that you are likely to use in any case (for example, the Diego colors I bought for $1.99 had a skin color, blue, black, and brown -- all good colors,) by all means -- pick those suckers up, and some for your mommy friends too.*
IMG_5348icingtb
Now the fun part! Fill your icing bags. For the finest details, use a #1 decorating tip -- and you don't have to get fancy if you don't have actual decorating tips, they just make it easier. As you can see in the picture below, for some of the colors I just used ziploc bags with the tiniest speck of the corner cut off.

But for the initial details, you are better off with an icing bag and a #1 decorating tip if you can get one.
Now, trace over the outlines that you want to see on your finished product. This bottom layer will be the top layer -- the one you see -- on your design.

IMG_5349doraicingtb
Once your bottom detail layer is established, you can fill in larger areas over the details with other colors of icing. You can't go back in and put details in at this stage if you leave them out, so think logically, one step at a time. It isn't hard and you can fix things later if you need to, so don't stress too much about it.
IMG_5350doraicingtb
Color in all the areas with the icing layers to a depth of about 1/4 inch. Fill in right to the edges and on top of your detail lines, so your whole design is supported by that 1/4" thickness of icing.

You can hold your glass up to the light to see if there are any pinpricks of light shining through your icing design, so you can fix those thin areas before you go on.

*This is when your children will come in and inform you that you have screwed up and your icing job was a good try, but it does not look like Dora. You may chuckle to yourself at how ignorant impertinent amazed they will be when you reveal the final design.*

Now, take the whole coloring page/glass/wax paper/icing design sandwich, and slip it into the freezer. You want it in the freezer until the icing is hard to the touch. I don't really know how long that takes, but I'd venture at least fifteen minutes.

IMG_5352cakedecptb
Now is a good time to busy yourself with making the sides and bottom edge of the cake look pretty, or doing the dishes, or having a beer, or whatever.
IMG_5353dorapictb
Now -- the magic! Take your coloring page/glass/wax paper/icing design sandwich out of the freezer and make sure the icing is nice and hard.

Un-tape the wax paper/icing, and quickly but carefully, up-end your design onto the cake. Press it down a little so it sticks.
Then, also quickly but carefully, before the design softens, peel back the wax paper to reveal the design.

Now, make the top edge of the cake look pretty with some stars or whatever (a #16 tip is good to use for decorating the sides and edges) and pipe your message.

Voila! You are a genius!
Or a broke monkey!
IMG_5355doraicingtb

Friday, December 7, 2012

Cookie Dough Bites

cookie dough bites

I don't know anyone who doesn't like chocolate chip cookie dough. These are the perfect treat for dough lovers made without eggs and bite sized.
Hands-On Time: 20 minutes
Ready In: 1 hour
Yield: 2 dozen cookies
Ingredients
    1 cup salted butter, softened
    1½ cups packed light brown sugar
    1 teaspoon vanilla extract
    2 cups flour
    6 ounces miniature chocolate chips
Directions
  1. Cream butter and sugar together.
  2. Add remaining ingredients and mix well -- use your hands to get it together the best.
  3. Roll into 1-inch balls.
  4. Refrigerate until firm, about 30 minutes. Dip in chocolate, drizzle with chocolate or eat as is -- equally delicious no matter what!
  5. Let stand at room temperature for about 10 minutes before serving.
  6. Store in the refrigerator.